3D Bugs
VISUAL ARTS LESSON PLAN
Grade Level: 2
Duration: 3 or 4 Class Periods
Author: Heather Hofstetter
Date: February 27, 2012
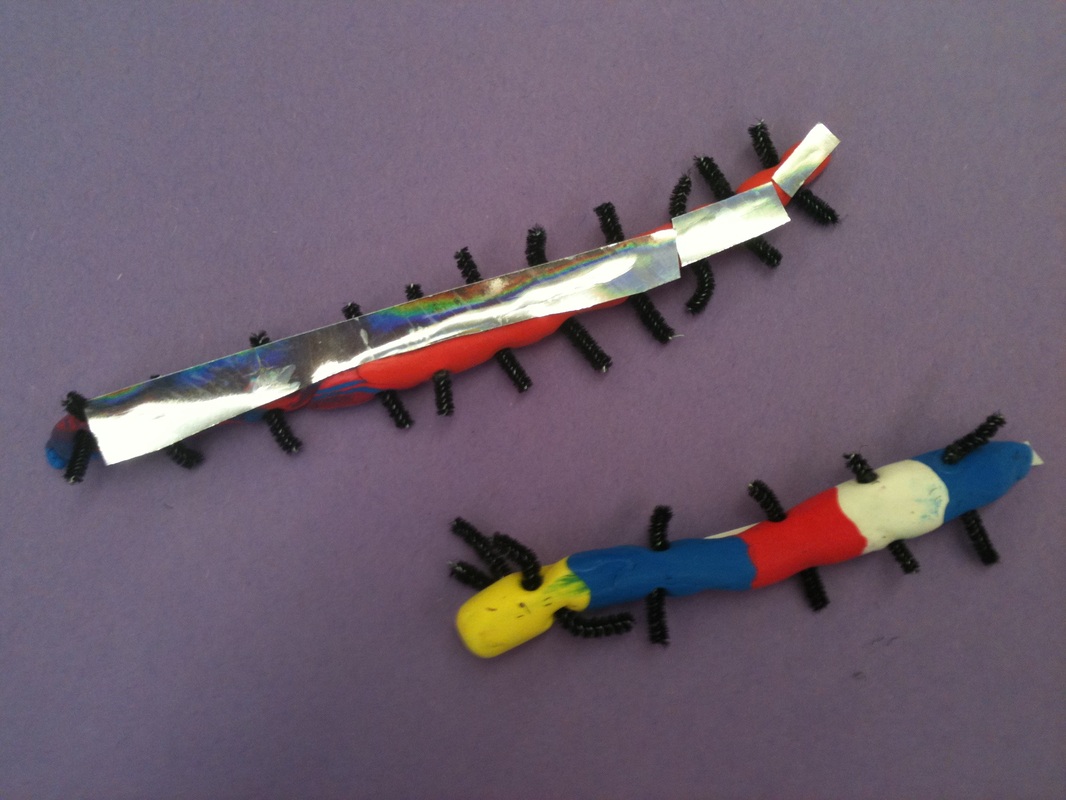
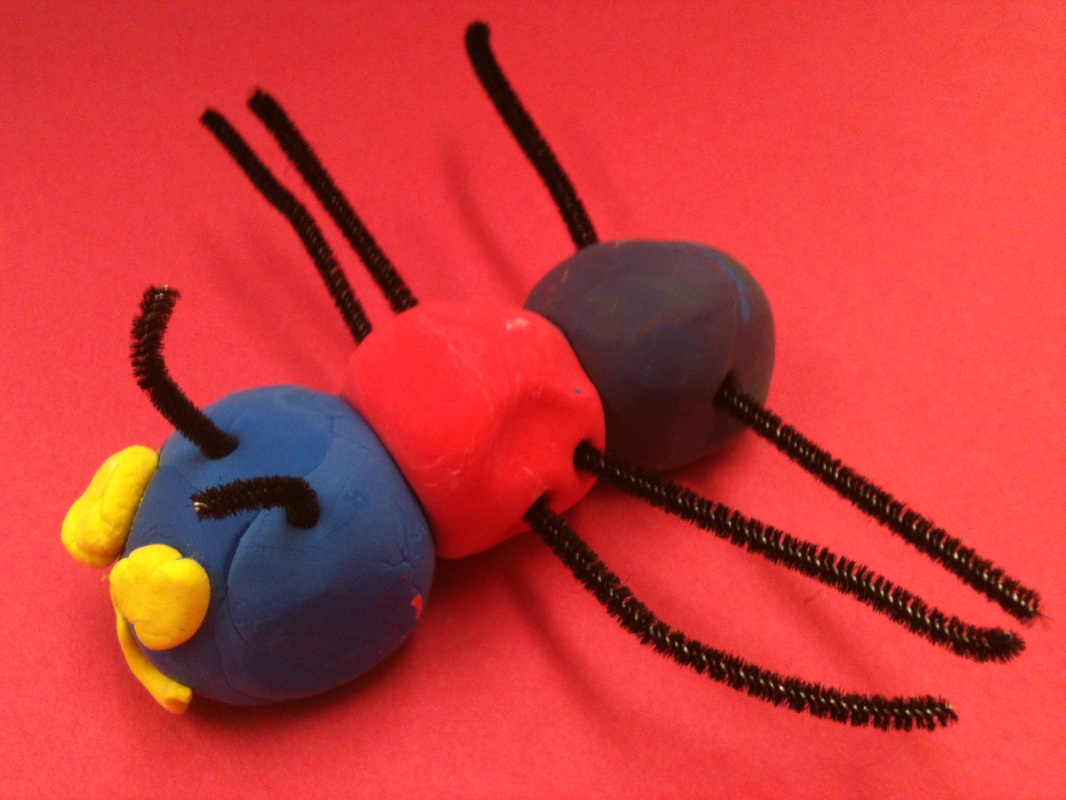
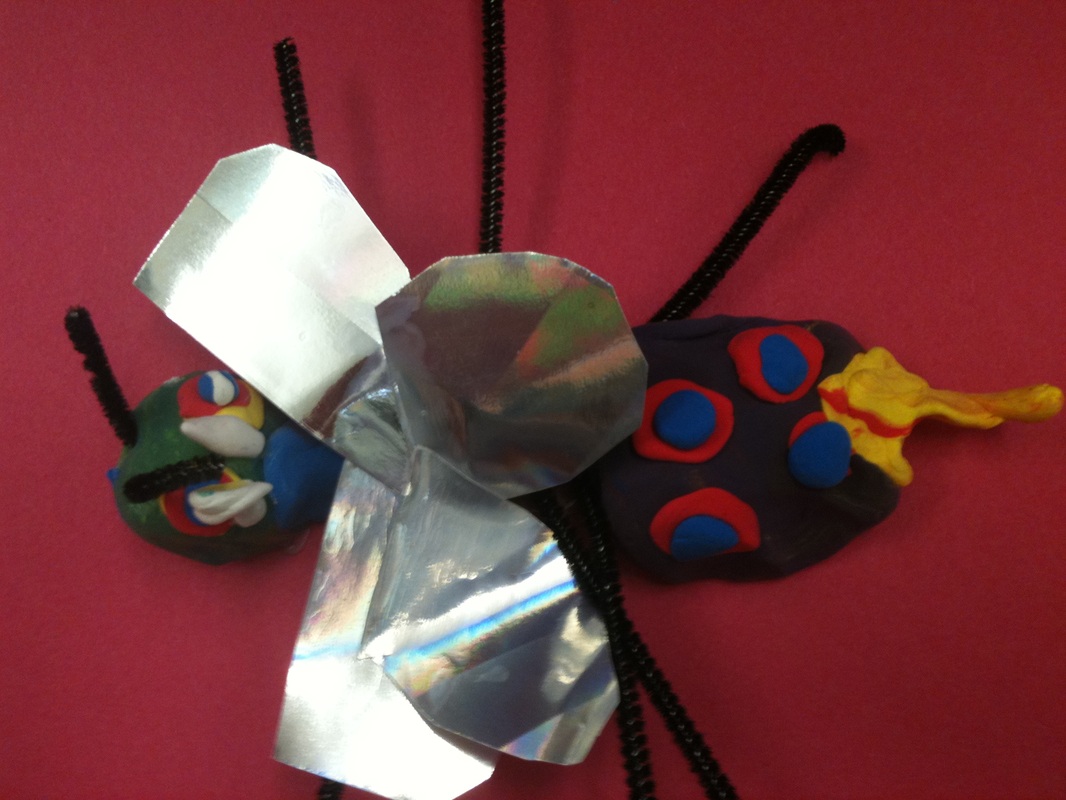
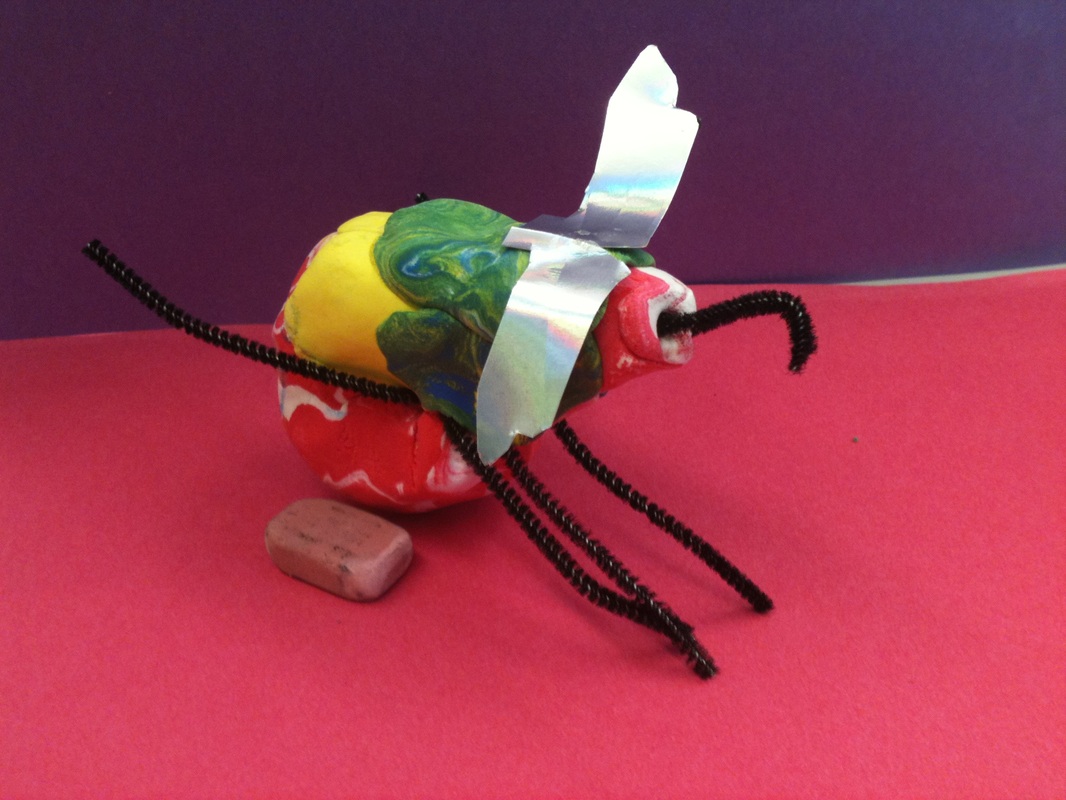
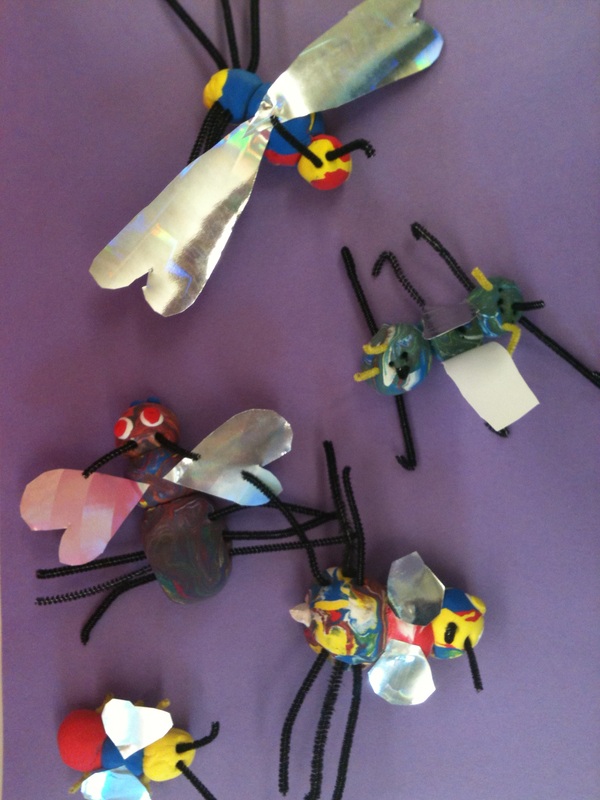
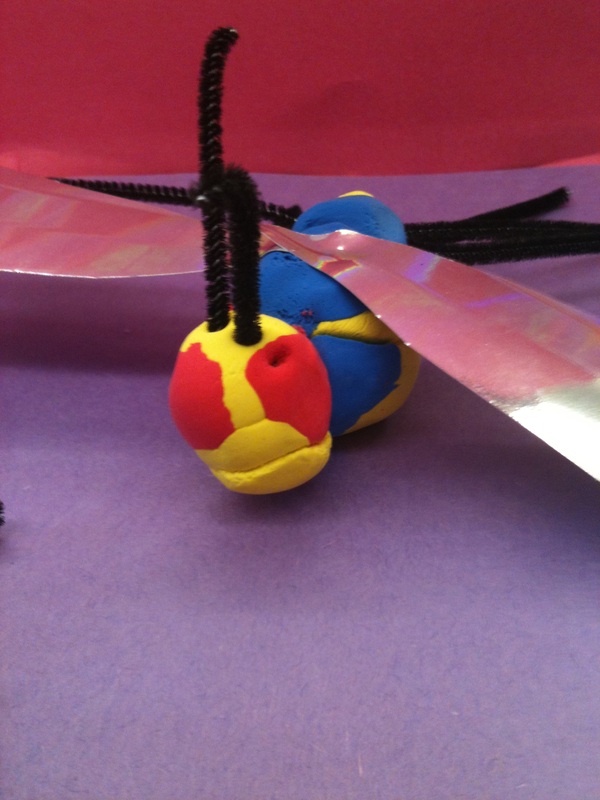
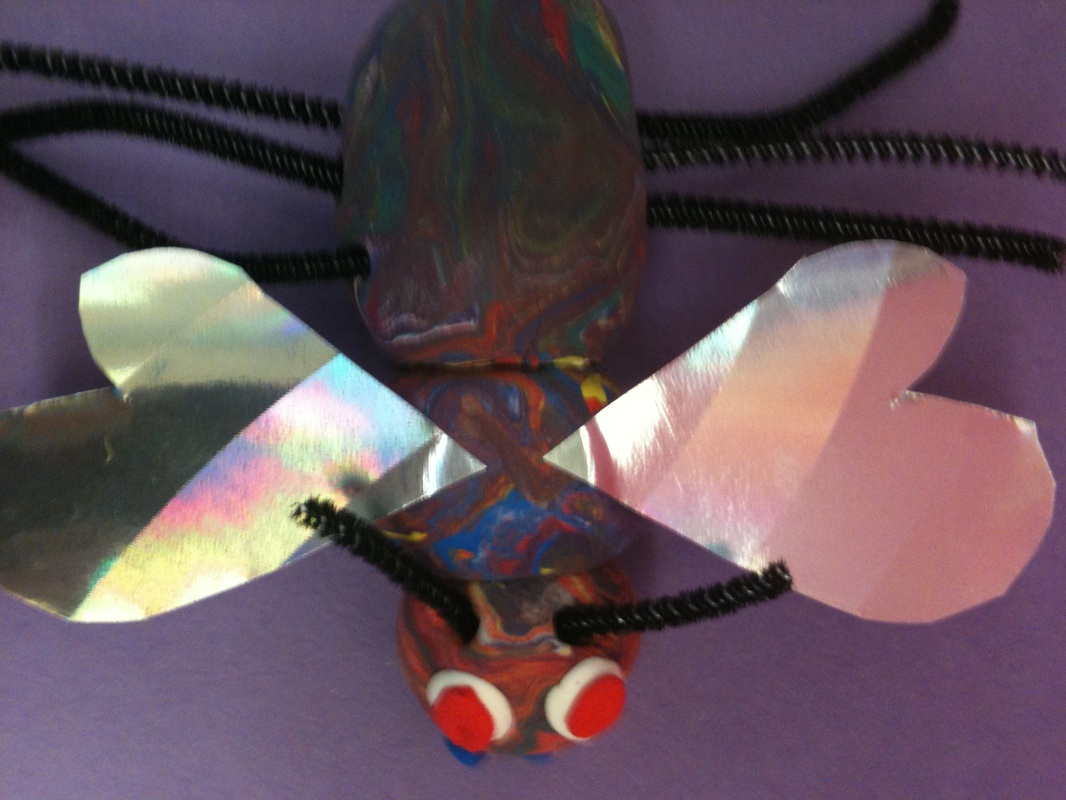
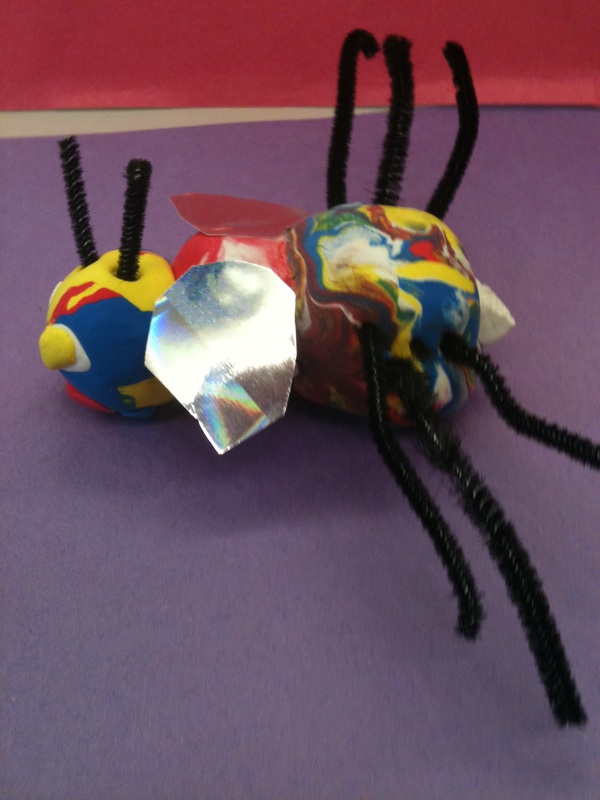
Lesson: 3D Bug Sculptures
Massachusetts Visual Arts Curriculum Framework Learning Standards
1.2 Create artwork in a variety of two-dimensional (2D) and three-dimensional (3D) media, for example: 2D – drawing, painting, collage, printmaking, weaving; 3D – plastic (malleable) materials such as clay and paper, wood, or found objects for assemblage and construction
3.3 Create 2D and 3D artwork from memory or imagination to tell a story or embody an idea or fantasy
Specific Lesson Objectives:
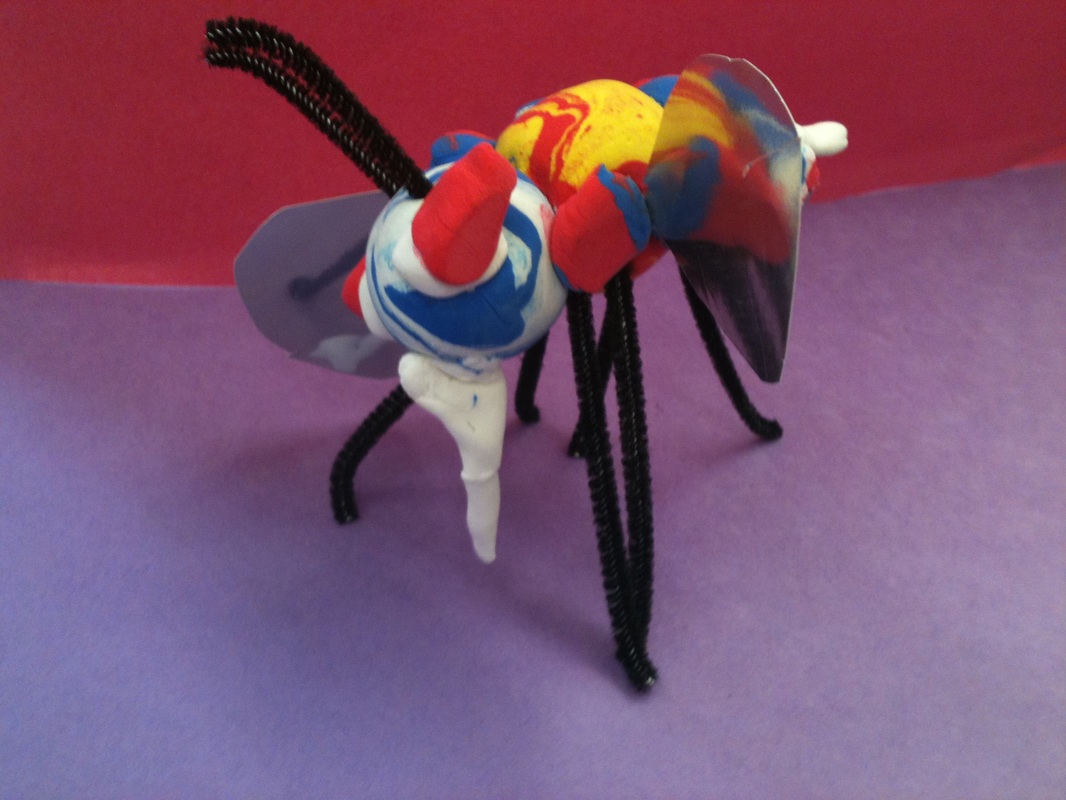
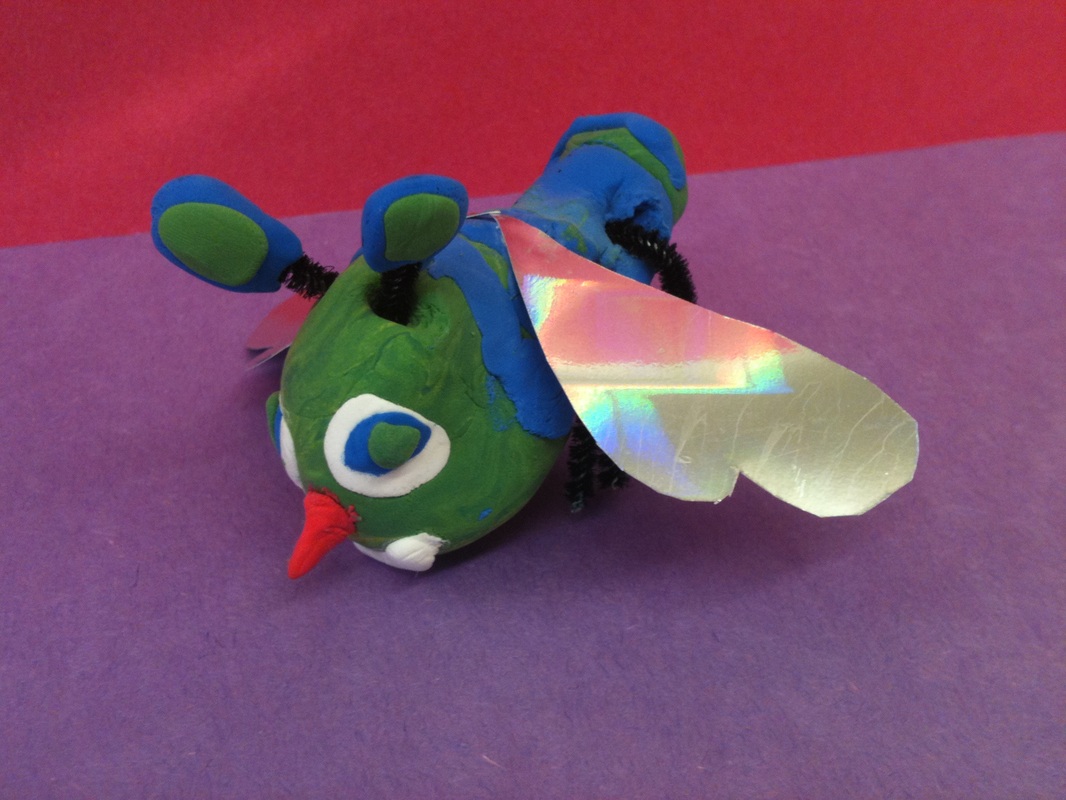
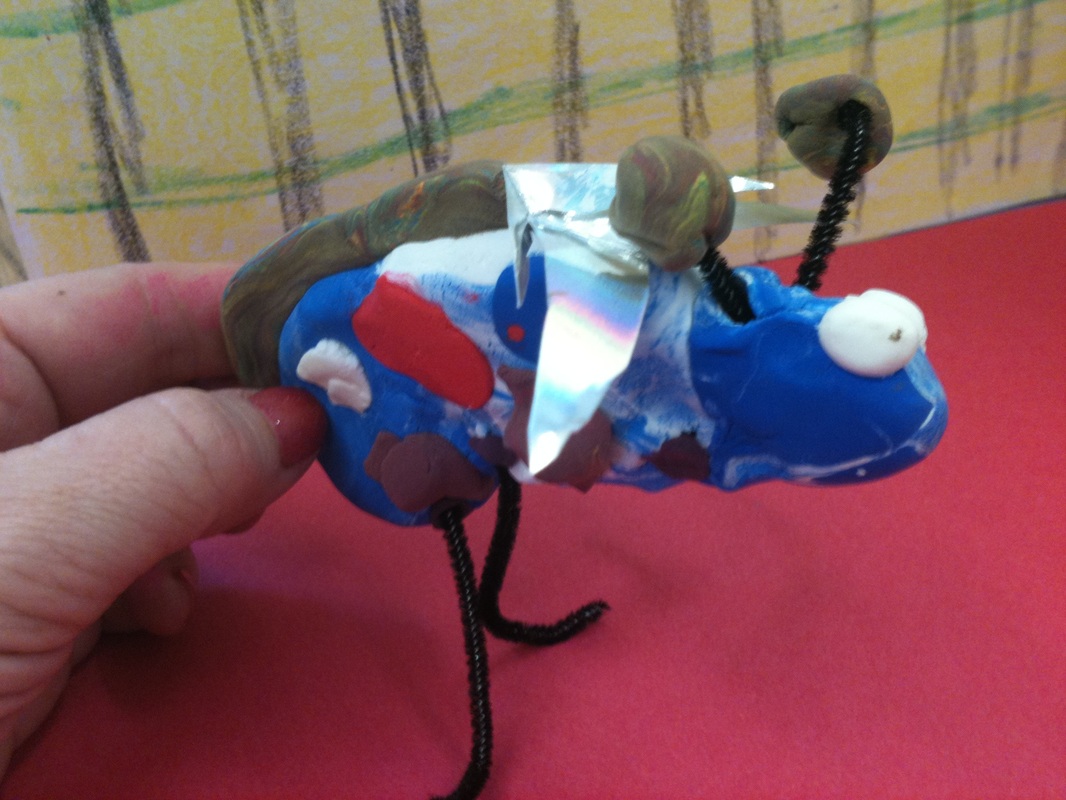
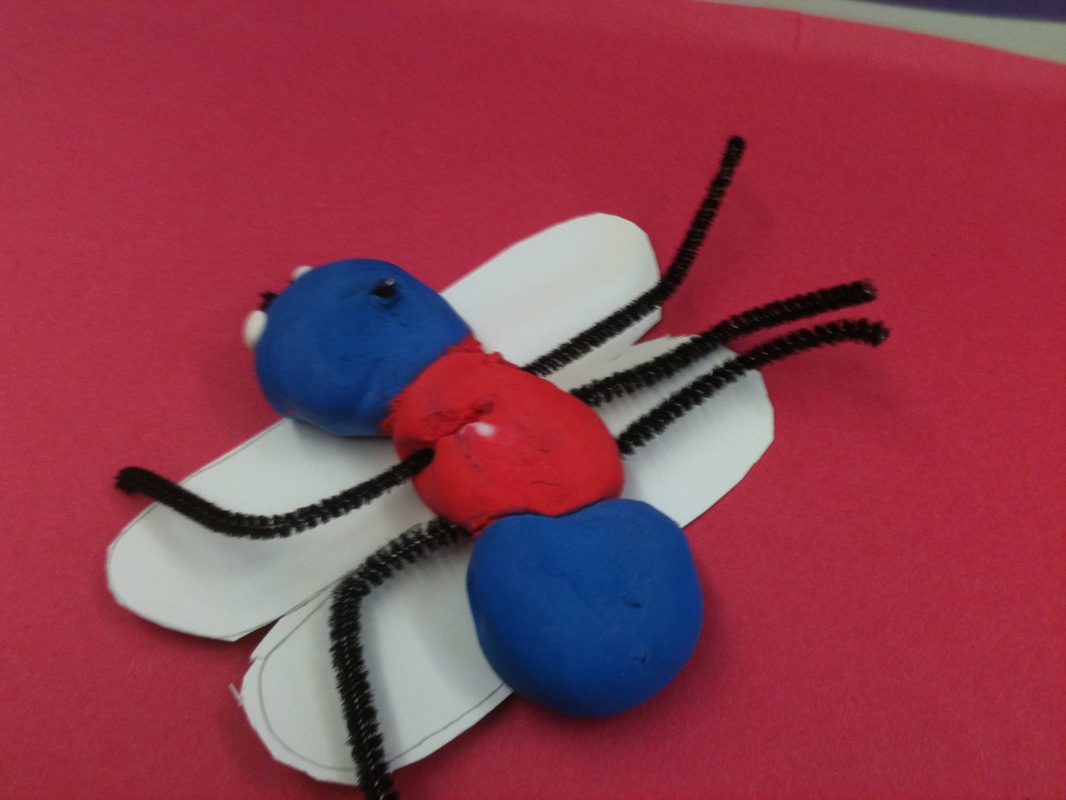
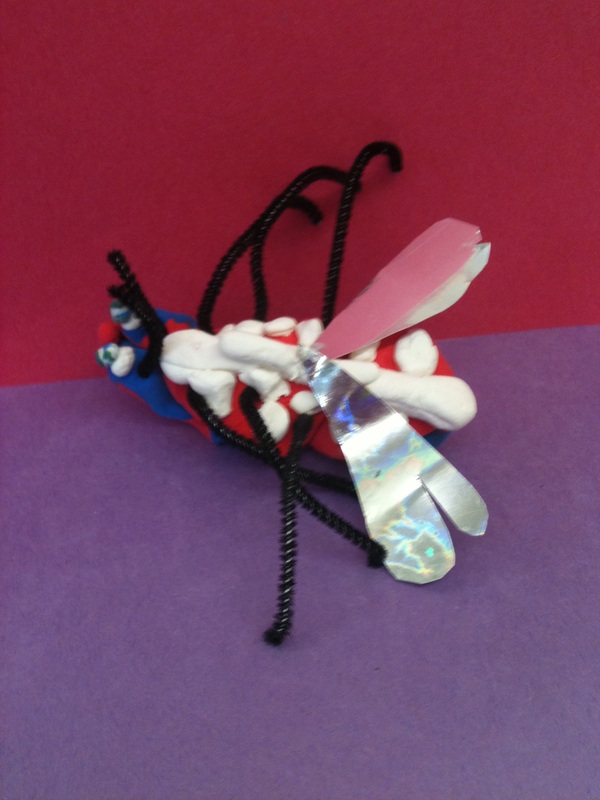
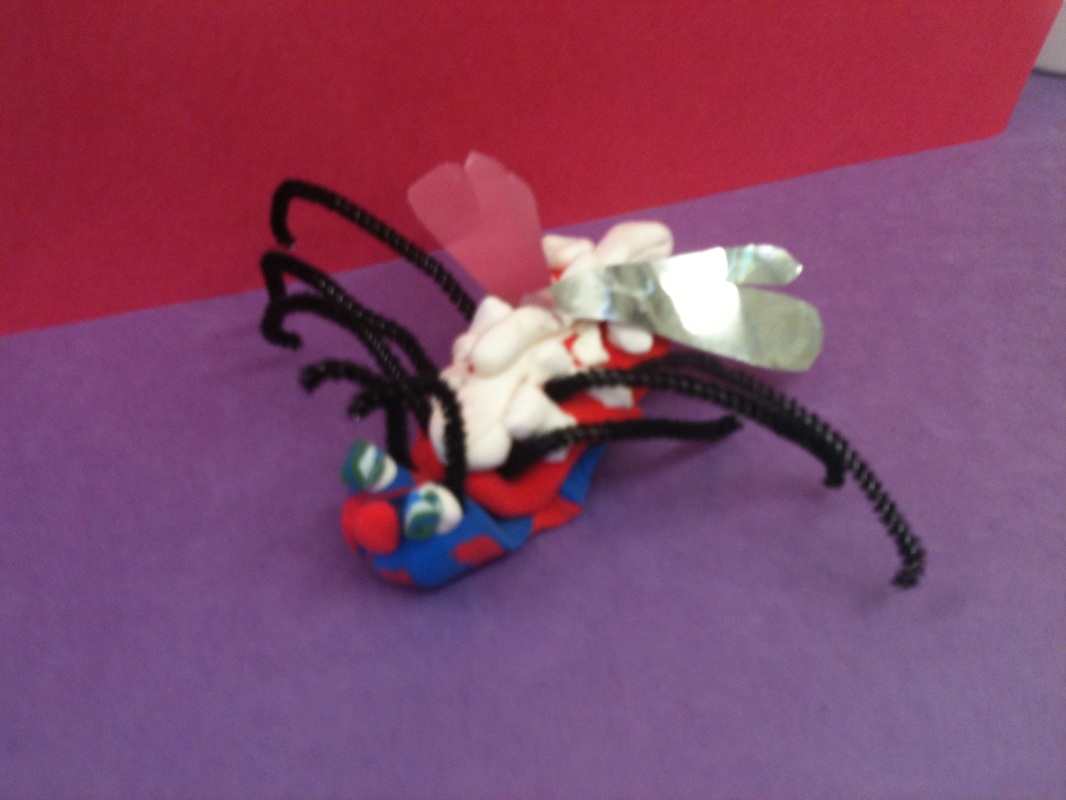
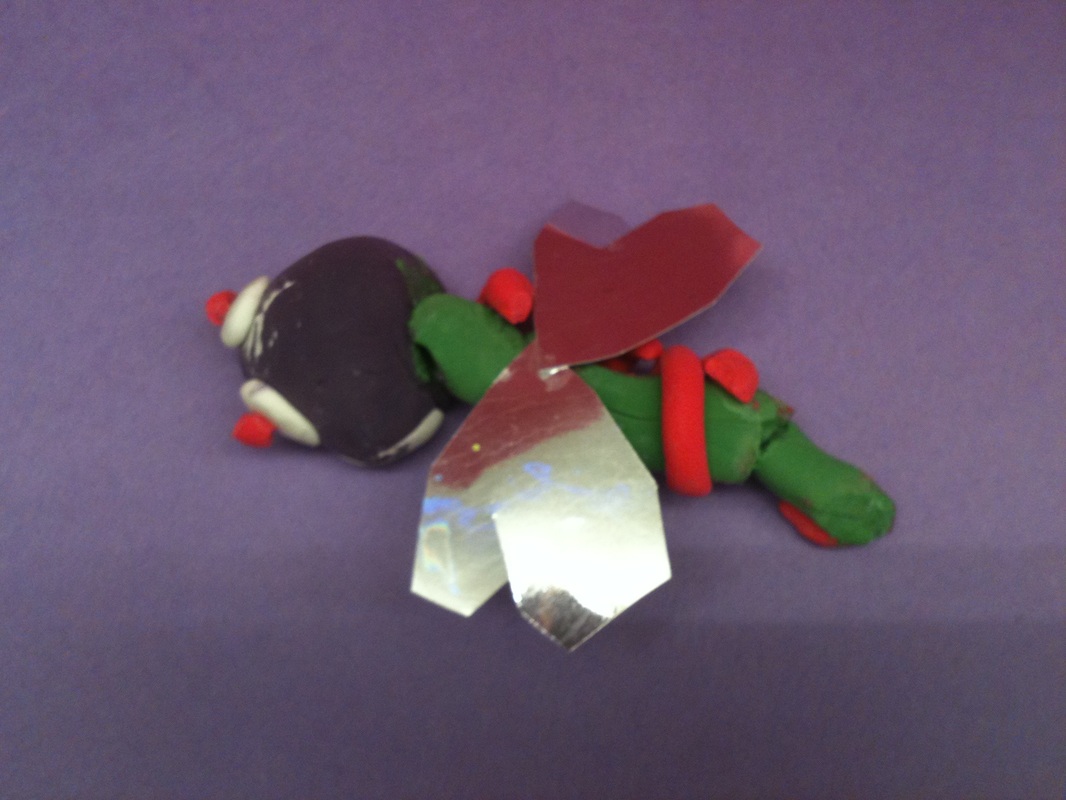
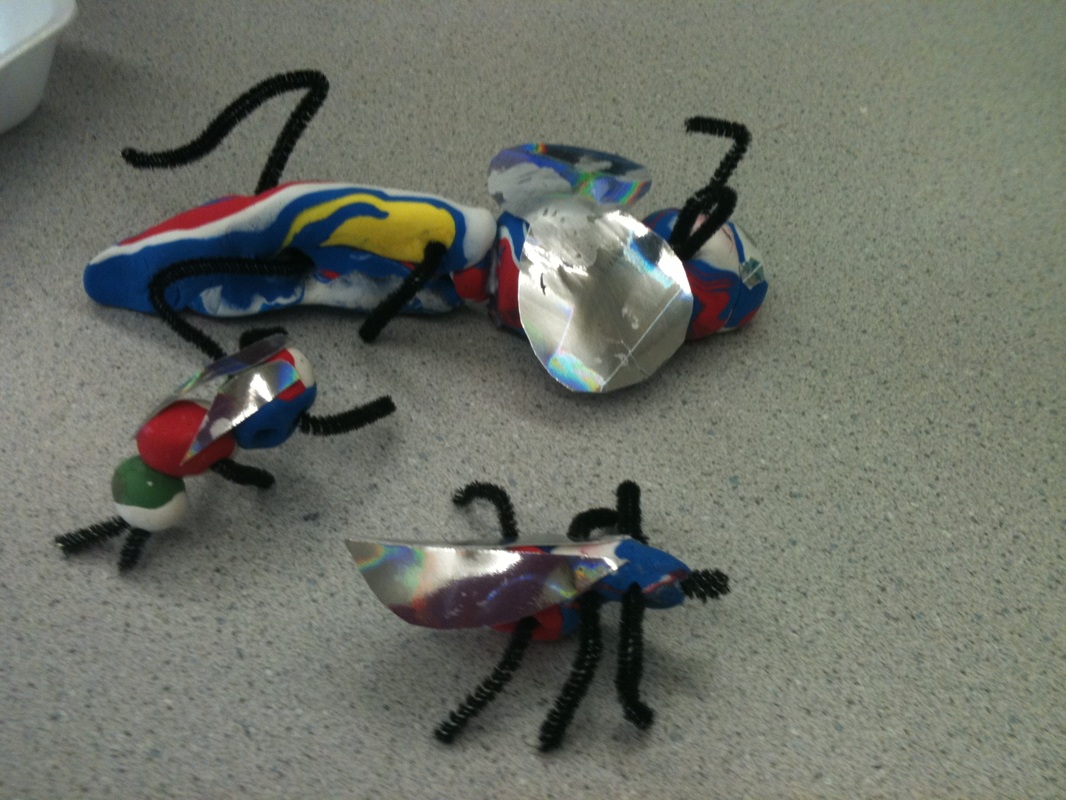
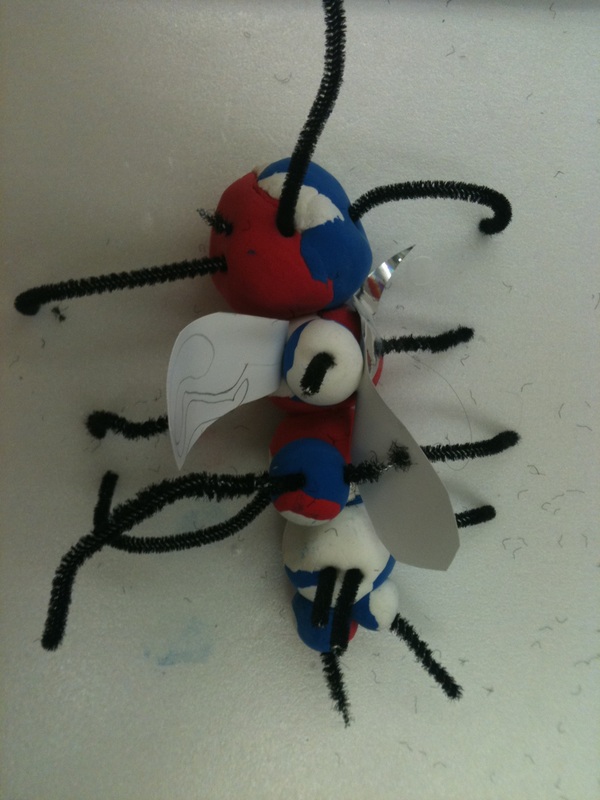
1.2 Students will learn to use a combination of media through creating a 3 dimensional bug sculpture using different colored 'Model Magic' clay and pipe cleaners.
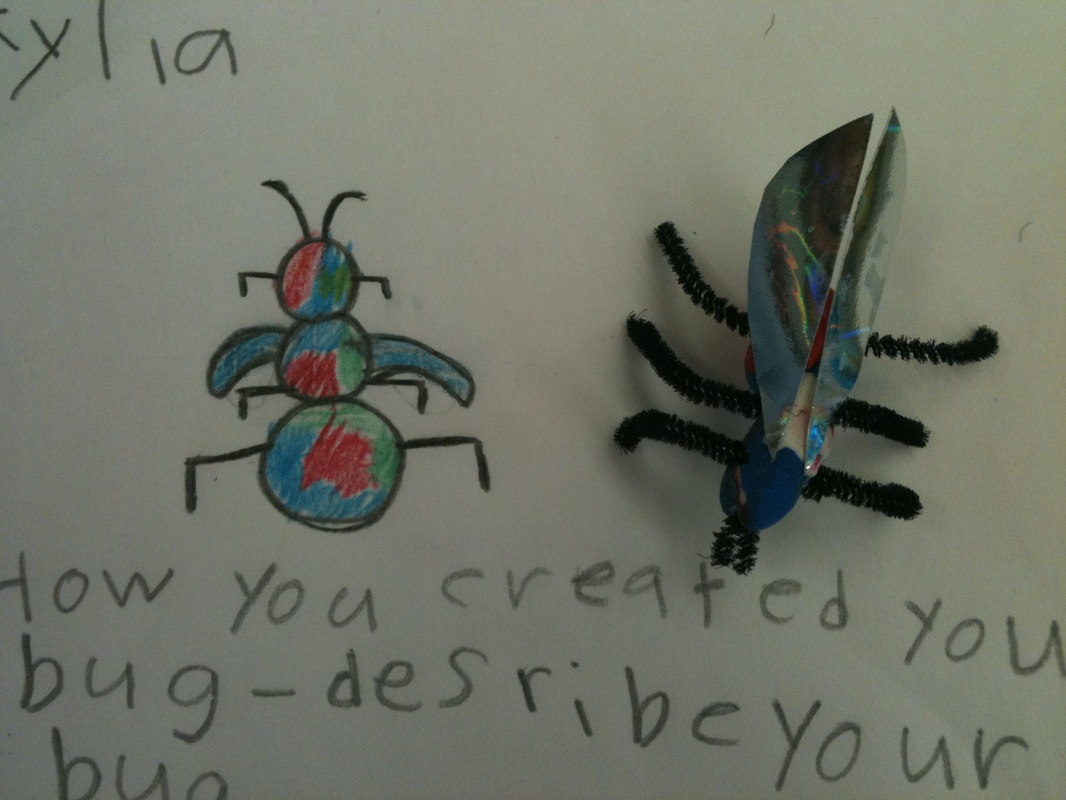
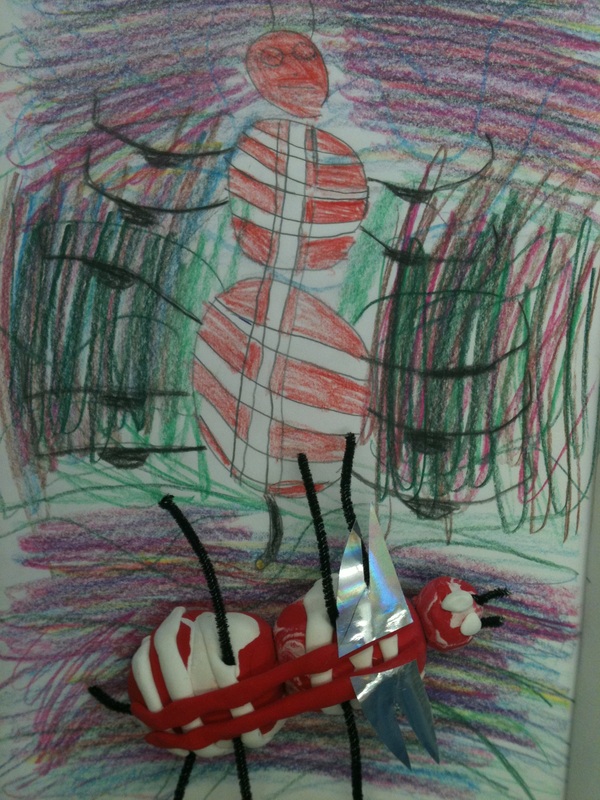
3.3 Students will learn how to use their imagination to construct their own model of a make-believe insect that they have created. They will observe models and images of real insects and arachnids, as well as read and brainstorm facts about bugs to aid in their creation.
Students will learn to use a combination of media through creating a 3 dimensional bug sculpture using different colored Model Magic and pipe cleaners.
.
1.2
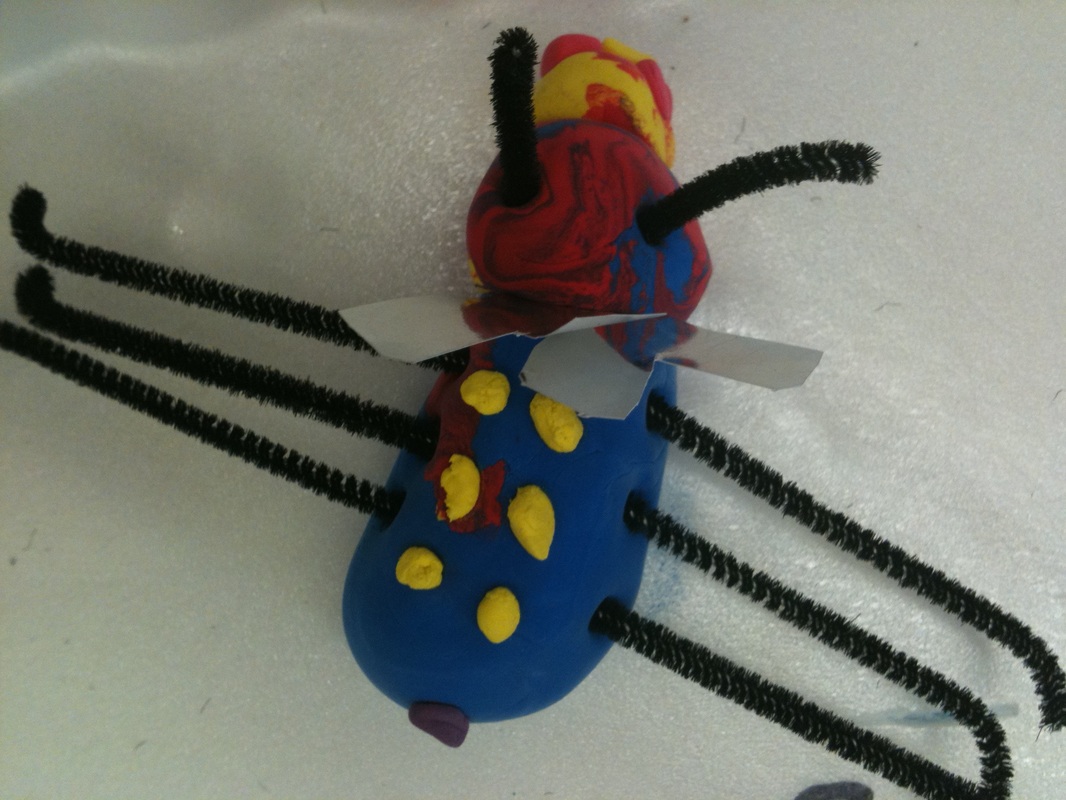
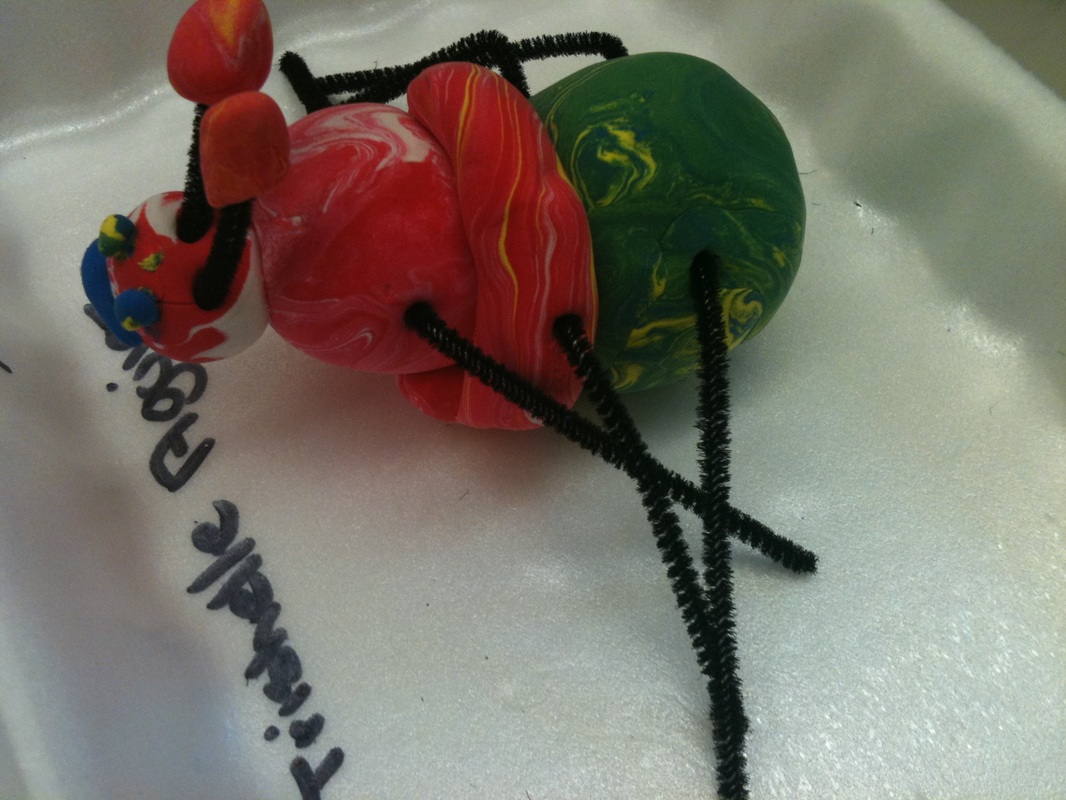
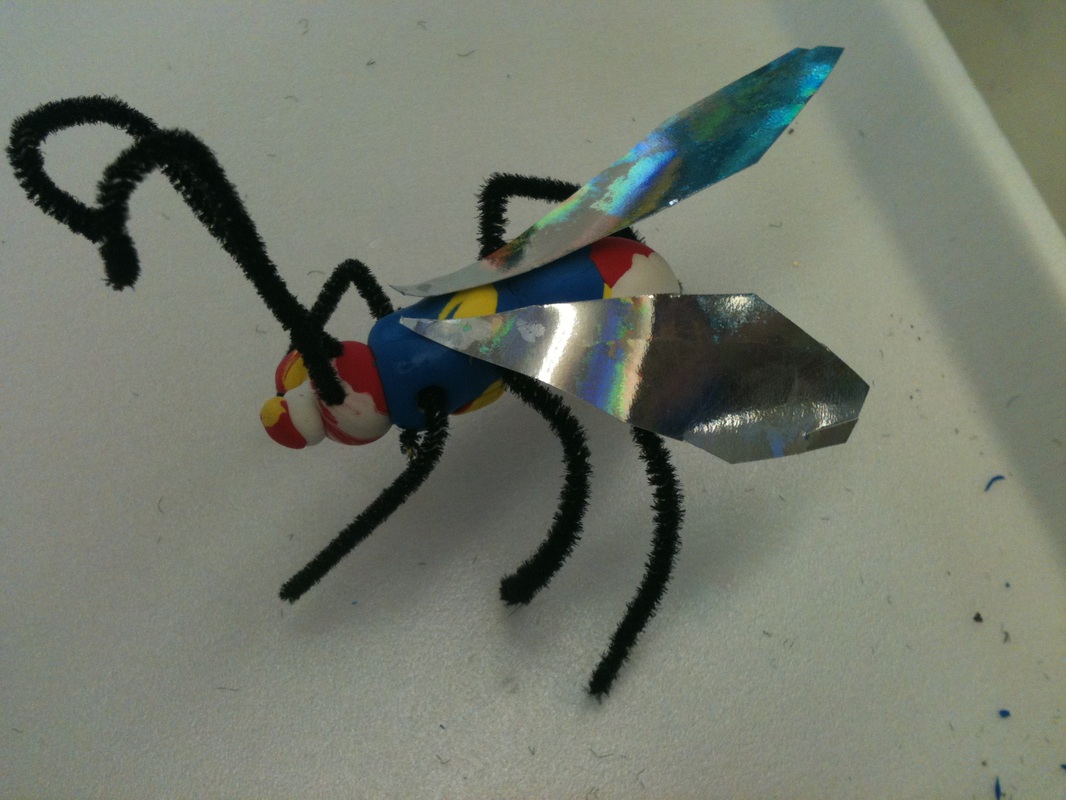
The final bug sculpture is 3 dimensional and free standing. It includes two different colors of 'Model Magic' clay and pipe cleaners included as legs. The sculpture shows neatness and craftsmanship and the details of the piece exceed what is asked.
The final work of the student displays the usage of 'Model Magic' clay. The final bug sculpture is 3 dimensional and freestanding with pipe cleaners incorporated for legs.
The student has shown an attempt to use the building materials. However, the final sculpture is not 3 dimensional or free standing.
The student did not show knowledge 3 dimensional hand building. The sculpture was not fully attempted or completed.
Students will learn how to use their imagination to construct their own model of a make-believe insect that they have created. They will observe models and images of real insects and arachnids, as well as read and brainstorm facts about bugs to aid in their creation.
3.3
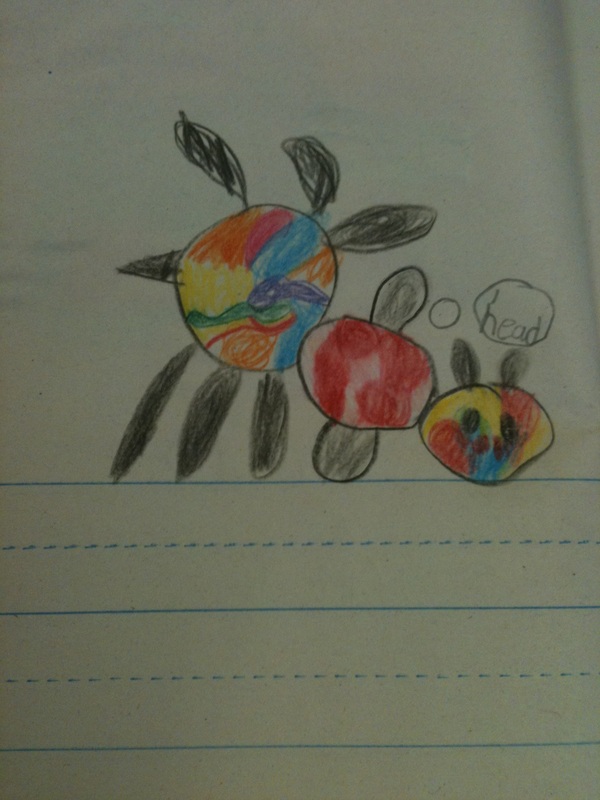
The final sculpture is derived from original ideas. It shows imagination and planning. The student participated in the drafting of the 3 dimensional bug idea in preliminary procedures, sketching, and brainstorming. The student is able to explain his bug and its characteristics. The final sculpture exceeds expectations.
The student has completed his/her final sculpture using original ideas and knowledge of the subject. The student has used preliminary sketching ideas and brainstorming to aid in his/her creation.
The final piece is complete but unoriginal. The student has used the same idea as the teacher or fellow classmate. Or the student has not participated in preliminary planning.
The piece is not complete or does not show original ideas.
Essential Questions:
What roles do/can bugs play in our environment?
Guiding Questions:
How do insects and arachnids work together in communities?
What makes them interesting?
When can you find them in the world around us?
What do you observe about insects and arachnids?
How can you use 3D modeling materials to create your own imaginary bug that can live and work in an imaginary environment?
Activity:
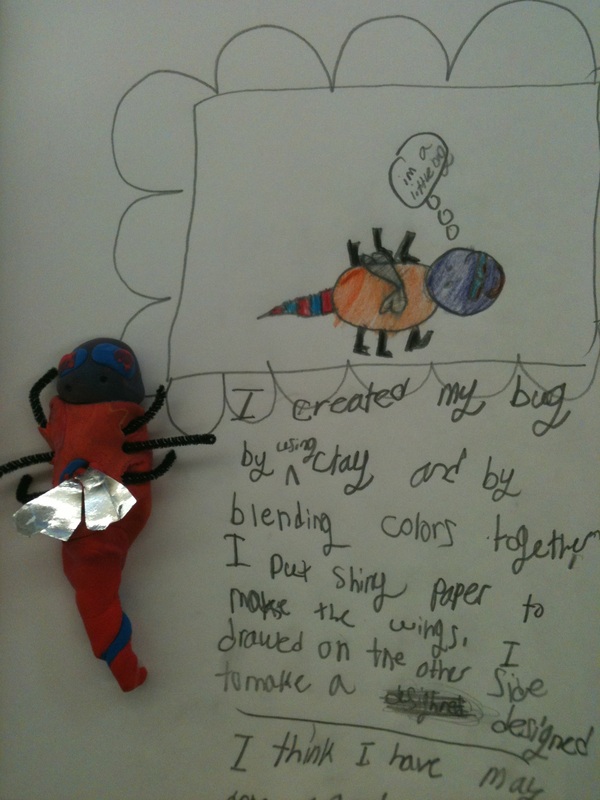
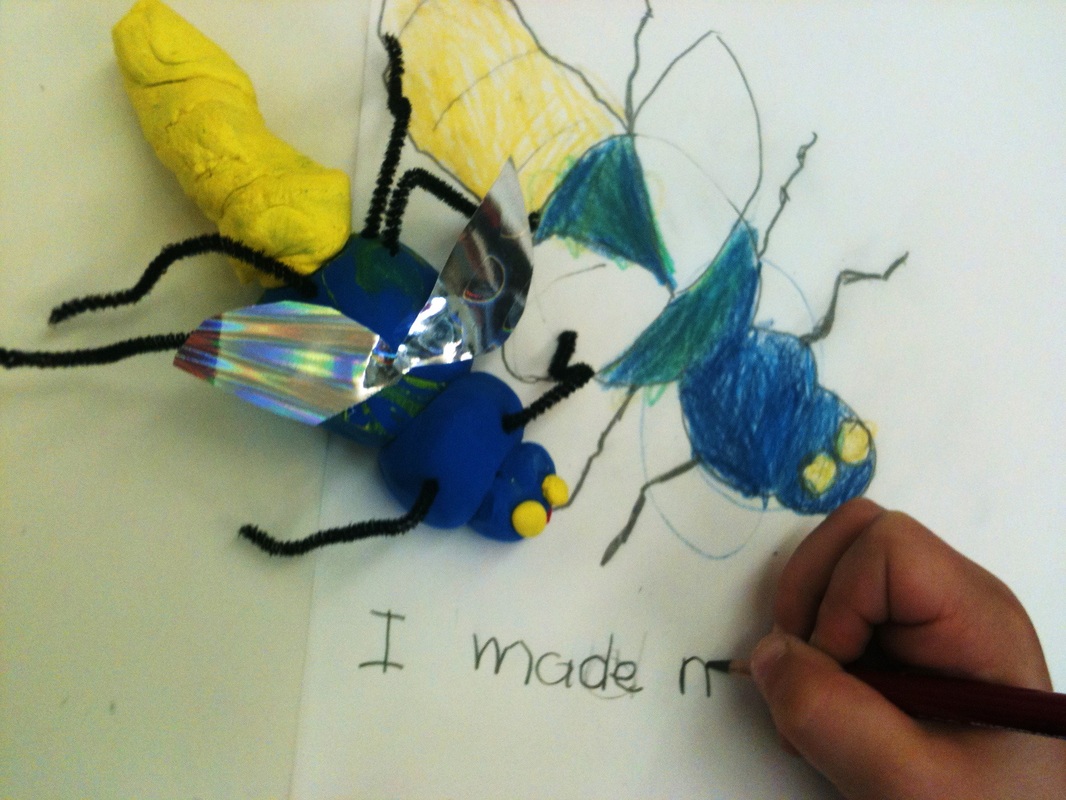
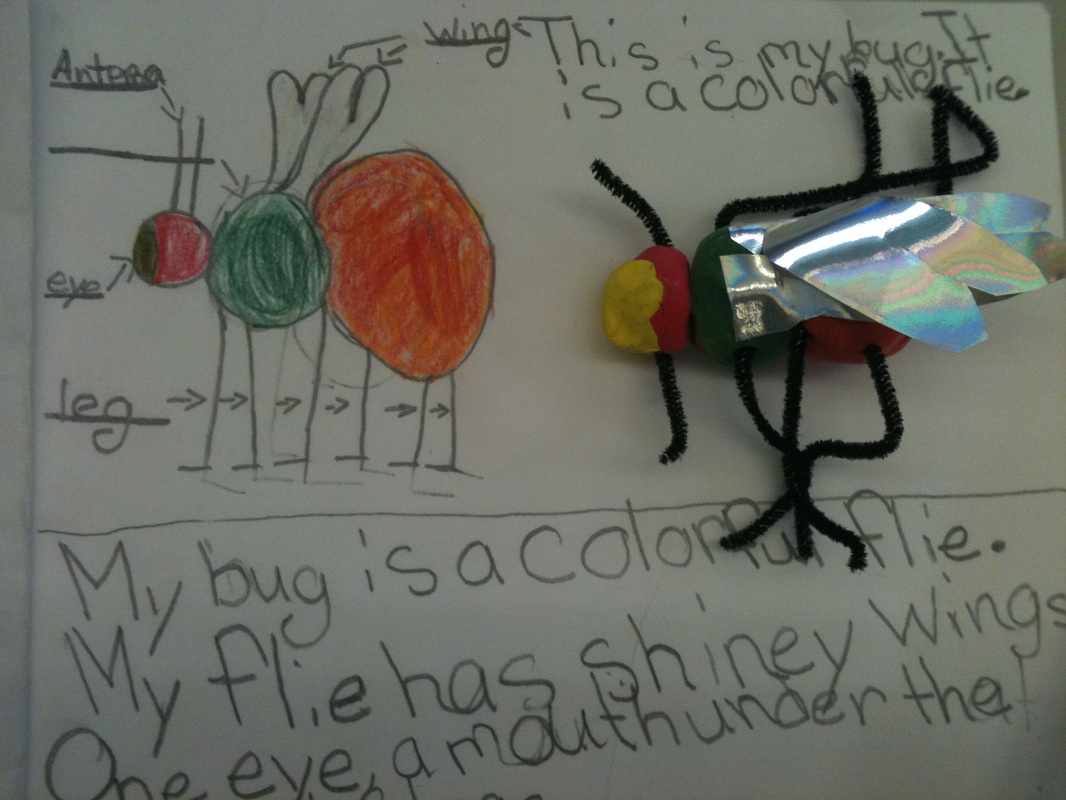
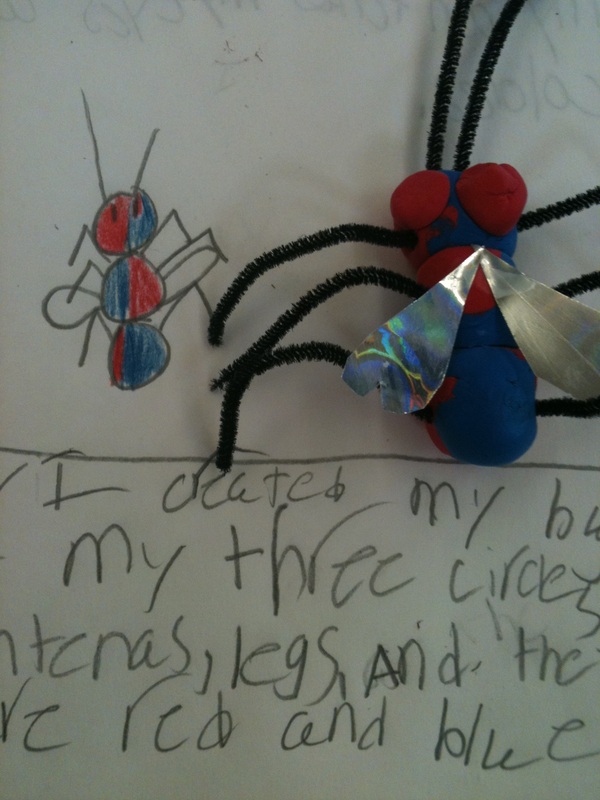
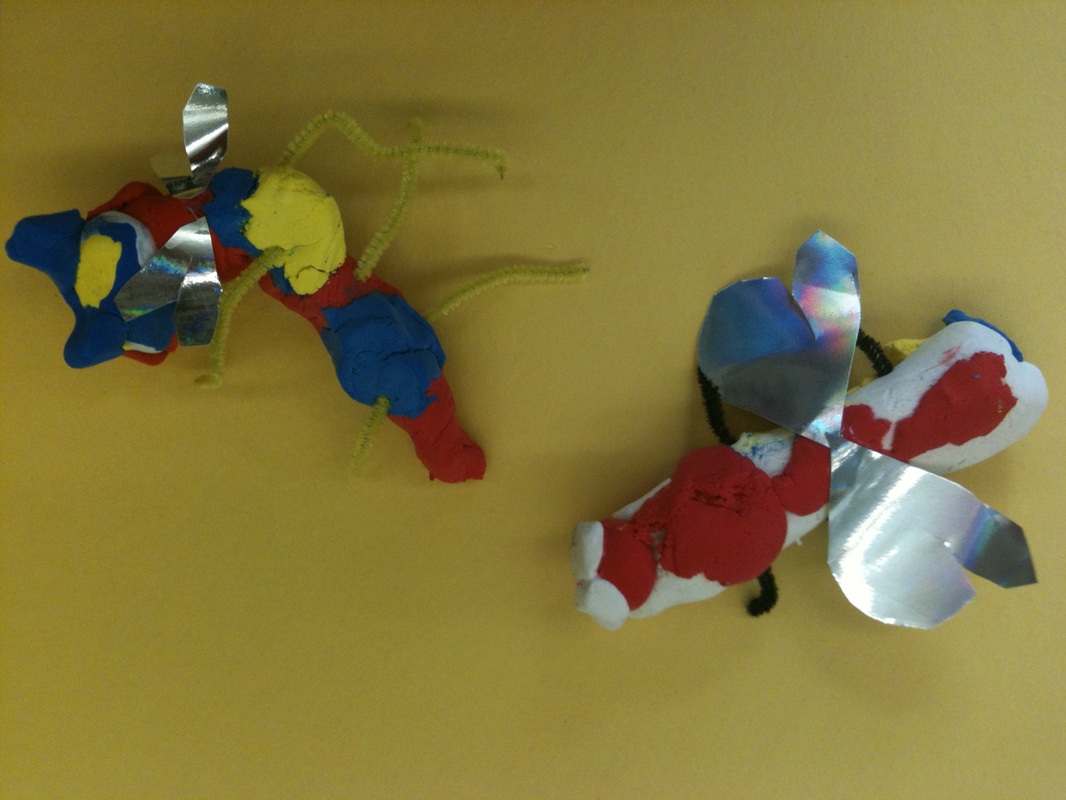
The students will be asked to design and create their own bug out of 'Model Magic' modeling clay and pipe cleaners. This will allow them to observe and learn more about the world around them, as well as, explore different types of 3D media.
Motivation:
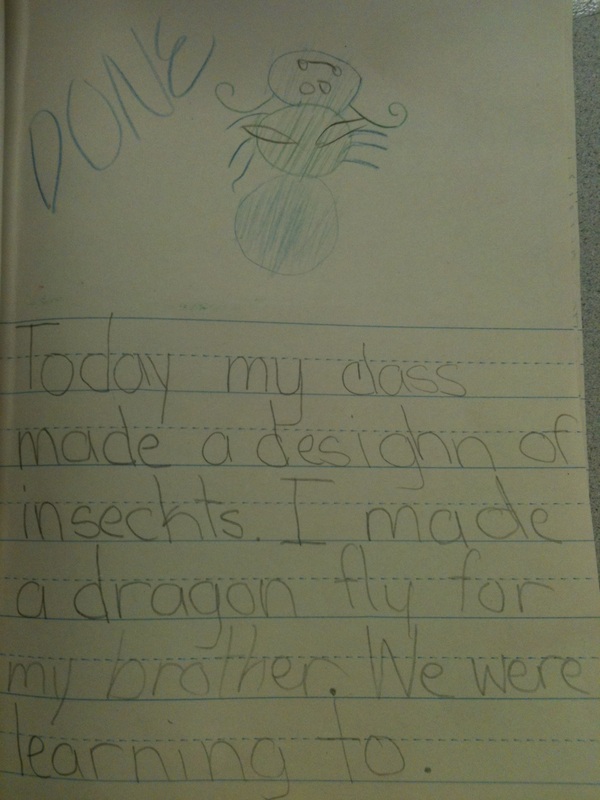
The teacher will help the students learn through building connections. The initial introductory class will include a reading from a large book on bugs around us and a review of different scientific characteristics of insects and arachnids. The teacher will ask the students questions about their prior knowledge of bugs and spiders, and allow them to answer and learn. The students will then be provided with different large models of insects i.e.; the dragon fly, the ladybug, the spider, the cricket, and the bee. The teacher will allow the students to pass around the plastic models and observe each magnified subject to formulate ideas on how they can build their own bug sculptures.
Materials:
Drawing Paper
Pencils
Styrofoam trays
Two colors of 'Model Magic' modeling clay
Pipe Cleaners
Plastic Wrap
Procedure:
Class Period 1:
As a preliminary lesson the first class will be dedicated to reviewing basic characteristics of insects and arachnids. The teacher will read the large book in front of the class while periodically asking the students for answers and participation in building connections. They will be asked about what they already know about insects and help them to understand specific science vocabulary used in the book. The teacher will then write highlighted bullets that he students have discussed on a large pad of paper to be displayed in front of the class.
The main characteristics of insects will be listed for the class to see after they have learned. In order to a species to be classified as an insect they must have:
After the brief lesson the students will he told that they will be creating their own imaginary bug based on what they have learned about insects and arachnids. They will have the freedom to design the bug however they want, but they will be expected to have meaning for their decision making. They will be given the choice of 2 colors of 'Model Magic', and so they must chose wisely before they begin hand building.
The teacher will then surprise the students by passing around large plastic models of different bugs. The students will be asked to observe the large models and then pass them on for the other students to see. The teacher will tell the students to look closely at the different body parts and details of the bugs so that they might use their findings to help them create their sculpture.
The teacher will first appoint student helpers to distribute sketch paper and pencils for the students to draw pictures and list characteristics of the bugs that they would like to create. They will be told that they may draw as many ideas as they would like and design as many insects in order to decide what they would like to create. They should have a concrete understanding of their bug before they gather their building materials.
If class time allows, when the students are just about collectively finished with their preliminary ideas and sketches, the teacher will ask a student helper to pass out a Styrofoam tray to each student. Then, the teacher will ask the children, table by table to come up to the front of the room to chose their two colors of "Model Magic'. During this time the students will also be asked between the colors black and yellow for their bug's legs (pipe cleaners), and the teachers will pass these out to each student.
Depending on time, the students will be asked to write their names on their Styrofoam trays and the materials will be stacked, and stored together for easy access when the students return for their next class.
Class Period 2:
The second class period will be spent constructing the bug sculptures. The students' sketches and building materials will be handed out at the very beginning of class after attendance. The teacher will provide the class with his/her personal examples of bug sculptures. The insect books and plastic models will also be available for the students to reference if needed.
The teacher will circulate the room helping the students and answering any questions. When the class has come close to an end the teacher will announce cleanup and appoint student helpers to collect the sketches and throw away any modeling clay wrappers. The students will then be asked, table by table, to carefully bring their sculptures to the side of the room to be stored in safe place before dismissal.
Note: if the student needs more time to work on his/her piece they will need to cover their 'Model Magic' with plastic wrap before storing. This is so the clay will not dry and harden before they are finished. If pieces do harden, they can be carefully dampened for further manipulation.
Class Period 3:
If the students need more time to complete their sculptures they will be passed out at the beginning of class. The teacher will circulate the room helping the students and answering any questions.
The teacher will announce that when the students are all or mostly finished they will be asked to quietly raise their hand, and the teacher will go over to the student and ask how they feel about their piece, what they could improve, and what they enjoyed/didn't enjoy about it. This is also where the student's imagination will come in. They will be asked to explain what the name of the bug is, and how it survives in its environment, where it lives, along with any additional comments etc...
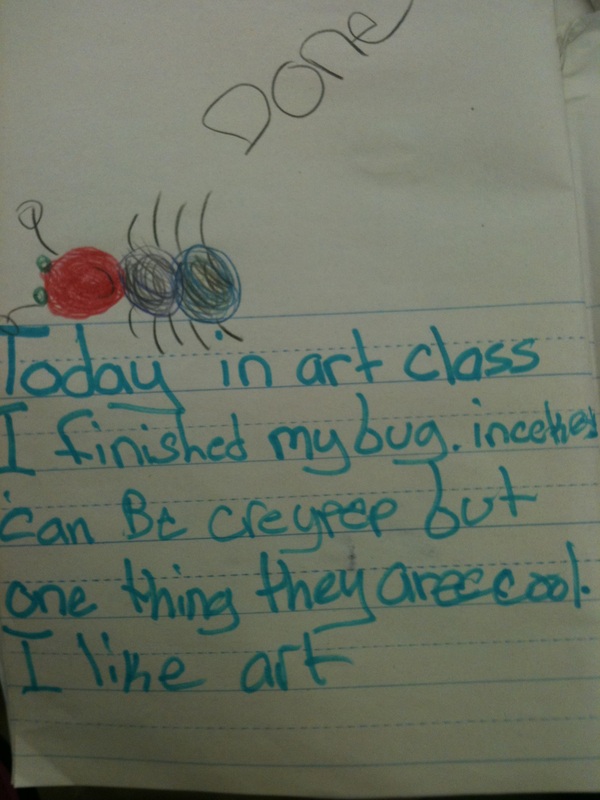
Once the pieces have been graded the students will be able to take their sculptures home with them, and they can use the rest of their class time to free draw or write a story about the bug that they have created.
(The teacher may also later decide to incorporate a painting component for students to include painted patterns or details on their dried 'Model Magic' sculptures.)
Grade Level: 2
Duration: 3 or 4 Class Periods
Author: Heather Hofstetter
Date: February 27, 2012
Lesson: 3D Bug Sculptures
Massachusetts Visual Arts Curriculum Framework Learning Standards
1.2 Create artwork in a variety of two-dimensional (2D) and three-dimensional (3D) media, for example: 2D – drawing, painting, collage, printmaking, weaving; 3D – plastic (malleable) materials such as clay and paper, wood, or found objects for assemblage and construction
3.3 Create 2D and 3D artwork from memory or imagination to tell a story or embody an idea or fantasy
Specific Lesson Objectives:
1.2 Students will learn to use a combination of media through creating a 3 dimensional bug sculpture using different colored 'Model Magic' clay and pipe cleaners.
3.3 Students will learn how to use their imagination to construct their own model of a make-believe insect that they have created. They will observe models and images of real insects and arachnids, as well as read and brainstorm facts about bugs to aid in their creation.
Students will learn to use a combination of media through creating a 3 dimensional bug sculpture using different colored Model Magic and pipe cleaners.
.
1.2
The final bug sculpture is 3 dimensional and free standing. It includes two different colors of 'Model Magic' clay and pipe cleaners included as legs. The sculpture shows neatness and craftsmanship and the details of the piece exceed what is asked.
The final work of the student displays the usage of 'Model Magic' clay. The final bug sculpture is 3 dimensional and freestanding with pipe cleaners incorporated for legs.
The student has shown an attempt to use the building materials. However, the final sculpture is not 3 dimensional or free standing.
The student did not show knowledge 3 dimensional hand building. The sculpture was not fully attempted or completed.
Students will learn how to use their imagination to construct their own model of a make-believe insect that they have created. They will observe models and images of real insects and arachnids, as well as read and brainstorm facts about bugs to aid in their creation.
3.3
The final sculpture is derived from original ideas. It shows imagination and planning. The student participated in the drafting of the 3 dimensional bug idea in preliminary procedures, sketching, and brainstorming. The student is able to explain his bug and its characteristics. The final sculpture exceeds expectations.
The student has completed his/her final sculpture using original ideas and knowledge of the subject. The student has used preliminary sketching ideas and brainstorming to aid in his/her creation.
The final piece is complete but unoriginal. The student has used the same idea as the teacher or fellow classmate. Or the student has not participated in preliminary planning.
The piece is not complete or does not show original ideas.
Essential Questions:
What roles do/can bugs play in our environment?
Guiding Questions:
How do insects and arachnids work together in communities?
What makes them interesting?
When can you find them in the world around us?
What do you observe about insects and arachnids?
How can you use 3D modeling materials to create your own imaginary bug that can live and work in an imaginary environment?
Activity:
The students will be asked to design and create their own bug out of 'Model Magic' modeling clay and pipe cleaners. This will allow them to observe and learn more about the world around them, as well as, explore different types of 3D media.
Motivation:
The teacher will help the students learn through building connections. The initial introductory class will include a reading from a large book on bugs around us and a review of different scientific characteristics of insects and arachnids. The teacher will ask the students questions about their prior knowledge of bugs and spiders, and allow them to answer and learn. The students will then be provided with different large models of insects i.e.; the dragon fly, the ladybug, the spider, the cricket, and the bee. The teacher will allow the students to pass around the plastic models and observe each magnified subject to formulate ideas on how they can build their own bug sculptures.
Materials:
Drawing Paper
Pencils
Styrofoam trays
Two colors of 'Model Magic' modeling clay
Pipe Cleaners
Plastic Wrap
Procedure:
Class Period 1:
As a preliminary lesson the first class will be dedicated to reviewing basic characteristics of insects and arachnids. The teacher will read the large book in front of the class while periodically asking the students for answers and participation in building connections. They will be asked about what they already know about insects and help them to understand specific science vocabulary used in the book. The teacher will then write highlighted bullets that he students have discussed on a large pad of paper to be displayed in front of the class.
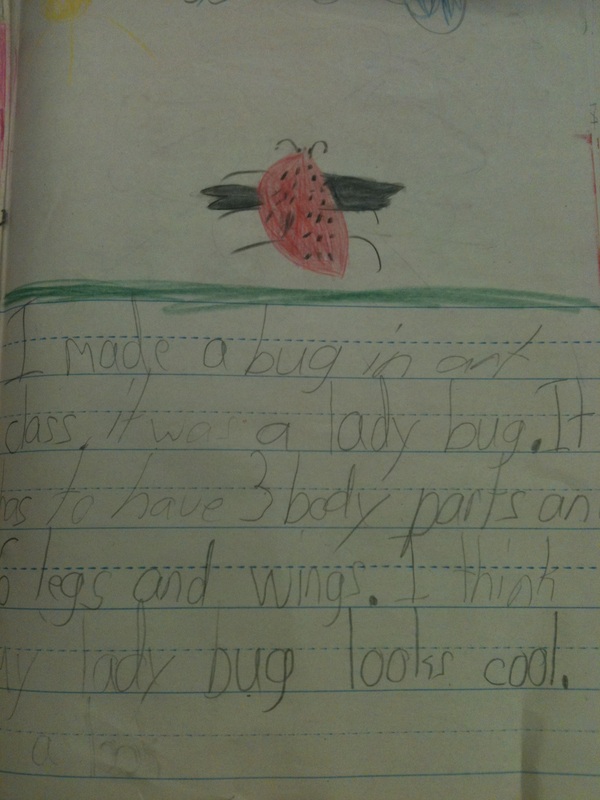
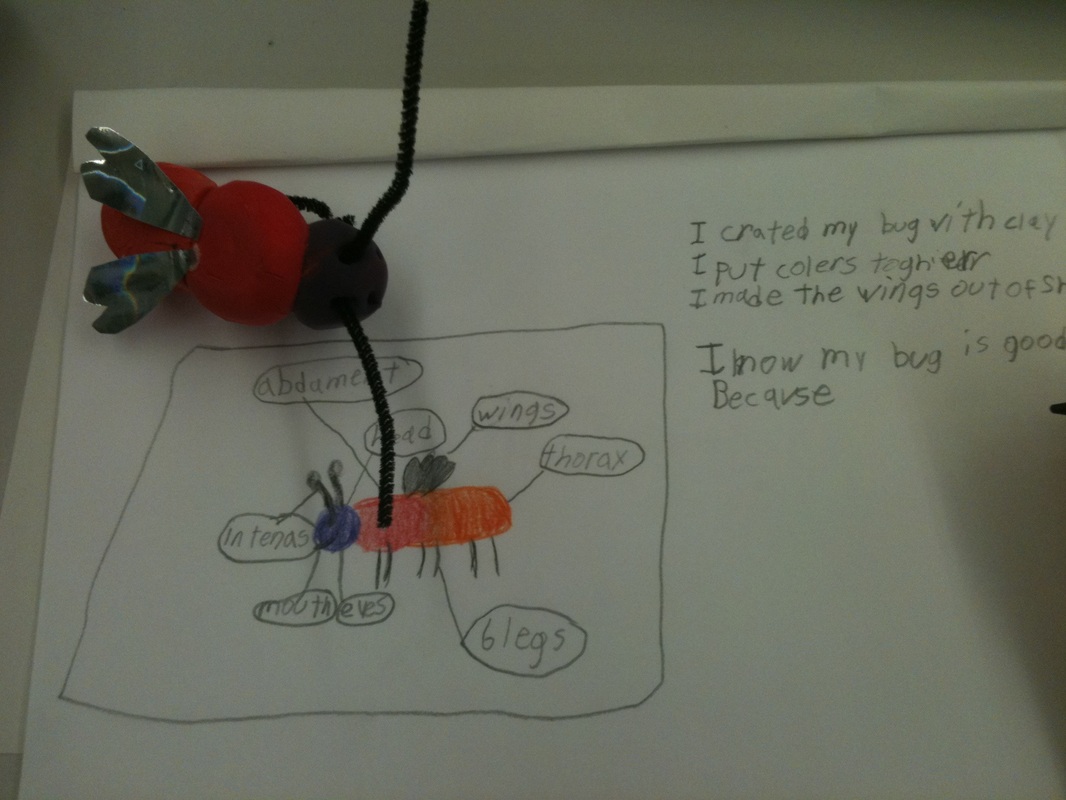
The main characteristics of insects will be listed for the class to see after they have learned. In order to a species to be classified as an insect they must have:
- Wings
- 6 Legs
- 3 Body Parts (Head, Thorax, and Abdomen)
- 8 Legs
After the brief lesson the students will he told that they will be creating their own imaginary bug based on what they have learned about insects and arachnids. They will have the freedom to design the bug however they want, but they will be expected to have meaning for their decision making. They will be given the choice of 2 colors of 'Model Magic', and so they must chose wisely before they begin hand building.
The teacher will then surprise the students by passing around large plastic models of different bugs. The students will be asked to observe the large models and then pass them on for the other students to see. The teacher will tell the students to look closely at the different body parts and details of the bugs so that they might use their findings to help them create their sculpture.
The teacher will first appoint student helpers to distribute sketch paper and pencils for the students to draw pictures and list characteristics of the bugs that they would like to create. They will be told that they may draw as many ideas as they would like and design as many insects in order to decide what they would like to create. They should have a concrete understanding of their bug before they gather their building materials.
If class time allows, when the students are just about collectively finished with their preliminary ideas and sketches, the teacher will ask a student helper to pass out a Styrofoam tray to each student. Then, the teacher will ask the children, table by table to come up to the front of the room to chose their two colors of "Model Magic'. During this time the students will also be asked between the colors black and yellow for their bug's legs (pipe cleaners), and the teachers will pass these out to each student.
Depending on time, the students will be asked to write their names on their Styrofoam trays and the materials will be stacked, and stored together for easy access when the students return for their next class.
Class Period 2:
The second class period will be spent constructing the bug sculptures. The students' sketches and building materials will be handed out at the very beginning of class after attendance. The teacher will provide the class with his/her personal examples of bug sculptures. The insect books and plastic models will also be available for the students to reference if needed.
The teacher will circulate the room helping the students and answering any questions. When the class has come close to an end the teacher will announce cleanup and appoint student helpers to collect the sketches and throw away any modeling clay wrappers. The students will then be asked, table by table, to carefully bring their sculptures to the side of the room to be stored in safe place before dismissal.
Note: if the student needs more time to work on his/her piece they will need to cover their 'Model Magic' with plastic wrap before storing. This is so the clay will not dry and harden before they are finished. If pieces do harden, they can be carefully dampened for further manipulation.
Class Period 3:
If the students need more time to complete their sculptures they will be passed out at the beginning of class. The teacher will circulate the room helping the students and answering any questions.
The teacher will announce that when the students are all or mostly finished they will be asked to quietly raise their hand, and the teacher will go over to the student and ask how they feel about their piece, what they could improve, and what they enjoyed/didn't enjoy about it. This is also where the student's imagination will come in. They will be asked to explain what the name of the bug is, and how it survives in its environment, where it lives, along with any additional comments etc...
Once the pieces have been graded the students will be able to take their sculptures home with them, and they can use the rest of their class time to free draw or write a story about the bug that they have created.
(The teacher may also later decide to incorporate a painting component for students to include painted patterns or details on their dried 'Model Magic' sculptures.)


Robert Delaunay Inspired Expressionism
VISUAL ARTS LESSON PLAN
Grade Level: 3-4
Duration: 3 or 4 Class Periods
Author: Heather Hofstetter
Date: April 22, 2012
Lesson: Robert Delaunay Inspired Abstract Painting
Massachusetts Visual Arts Curriculum Framework Learning Standards:
2.1 For color, explore and experiment with the use of color in dry and wet media
Identify primary and secondary colors and gradations of black, white and gray in the environment and artwork.
3.2 Create 2D and 3D expressive artwork that explores abstraction.
Specific Lesson Objectives:
2.1 Students will learn to identify primary and secondary colors in the tempera paint medium. They will also be able to create gradations by mixing black and white with color pigment.
3.2 Students will learn how to use shapes, color, and line to create an abstract, non-representational, 2D composition.
Assessment of Learning
Grading Rubric
Lesson: Robert Delaunay Inspired Painting
Lesson Objective
Standard
Number
Evidence Beyond Mastery
(4 points)
Evidence of Mastery
(3 points)
Evidence of Need to Improve toward Mastery
(2 points)
Little or no attempt toward Mastery
(1 point)
Students will learn to identify primary and secondary colors in the tempera paint medium. They will also be able to create gradations by mixing black and white with color pigment.
.
2.1
The final work shows exemplary evidence of gradation and thoughtful placement of primary and secondary colors. There might even be usage of complimentary color relationships.
The piece shows gradation of color with mixed tones through usage of black and white in the color. Primary and secondary colors are used in the painting carefully.
The student has shown an attempt to use color but still is confused with the gradation process.
The student has not exhibited an attempt to mix black and white with colors to create gradations. There is not a wide enough array of primary and secondary colors.
Students will learn how to use shapes, color, and line to create an abstract, non-representational, 2D composition.
3.2
The final painting exceeds expectations by exhibiting careful, thought out, placement of line and color. Shapes have been created and each section is carefully painting to come together to create a very strong, balanced composition.
The student has completed his/her painting using shapes, color, and line. The piece shows that the student has followed directions and the piece is abstract and non-representational, true to the style of Robert Delaunay.
The final piece is complete but does not use designated shapes or color.
The piece is not complete or does not show knowledge of color.
Essential Questions:
How can I create an interesting non-representational composition using shapes?
Guiding Questions:
How can I place certain colors to create visual interest?
How do colors affect each other?
How can mix in black and white to create gradation of color?
What types of lines and shapes can I use to add to the painting?
Activity:
The students will be asked to create a colorful abstract painting using shape, color gradation, and line in the style of Robert Delaunay.
Motivation:
The teacher will help the students learn about color through a brief lesson on the color wheel. The different primary and secondary colors will be identified, and then a color mixing demonstration will be held for the students to learn more about the media of tempera paint. The teacher will also give an epigrammatic background of the life and style of the French painter, Robert Delaunay, whom the little artists will be looking to for inspiration.
Materials:
Good-quality white paper
Pencils
Rulers
Plastic shape tracers
Lids, jars, cups or circle tracers
Tempera Paint
Brushes
Water containers
Paper towels
Styrofoam trays or paper plates for pallet
Procedure:
Class Period 1:
At the beginning of the first class period the students will revisit the concept of abstract, non-representational art. It will be revisited and explained that abstract artwork is primarily about line, shapes, and color and not about representation of a specific physical subject. The teacher will begin to describe that Robert Delaunay is an example of a master abstract artist who was greatly influenced by the Cubist painters of his time (Henry, 2007). Cubist artist created artwork by breaking apart images and reassembling them to create an abstracted composition. In the case of Delaunay, he looked at the way light reacted in nature and sought out to create rhythm and motion with color in his paintings.
The color wheel will be revisited. The teacher will explain and demonstrate with small strokes of paint in front of the room, that one can use complimentary colors and gradients my mixing black and white to colors to create movement and visual interest.
The teacher will then do a demonstration in the front of the room first tracing circular shapes and ruled lines placed in specific areas in pencil on a sheet of paper. It will be explained to the students that each section they create in their composition will afterward be painting each a different color so that no two shapes that are touching should be the same color.
After the under drawing demo, the students will be given their pieces of paper and pencils, and erasers will be put on each table. A designated helping student will also hand rulers out to each classmate, and an assortment of shape tracers and objects will be made available for the students to use. The students will create their under drawings.
Due to time constraints of the class period the students will probably not be able to start painting until the following class. Clean up will be announced 5 minutes before class and the rulers, pencils, erasers, tracers, and drawing will be collected by helper students.
Class Period 2:
The second class period will be when the students can begin painting. The teacher will begin with a brief review of the assignment to ensure that the students are reminded of the objectives and procedures. Once pencil drawings have been handed out, each student will be given a Styrofoam tray or paper plate to act as a pallet for mixing paint. Each student will be given paper towels, a paintbrush, and a water cup for rinsing (the students will be reminded that they need to rinse out the brushed thoroughly before they dip them into a new color so that the paints do not get muddy).
The teacher will prepare the pigment by squirting tempera paint into plastic bottle caps to hand out. To aid in possible mess prevention the teacher may decide to only give out certain colors to each table for the first half of the class period, reminding the students to leave sections white for varied color possibilities. Then, he/she may ask the students to switch paint cups with the neighboring table so that everyone will be allowed the chance to use the primary and secondary colors.
The teacher will circulate the room offering suggestions and answering questions when needed. Due to the nature of paint cleanup will begin a few minutes earlier than usual. The paintbrushes will be collected and rinsed out but one or two students. The paint cups will be washed and the trays will be wiped off and reused for future classes. The students will be asked table by table to come to the front of the room and place their painting in the drying rack before lining up.
Class Period 3:
The third class period will be used for the students to further work on their paintings. Supplies will be distributed as before and the students should already know what they need to do to complete their abstract paintings. If they do not, the teacher will help explain or ask if a fellow classmate can help. When the students are finished they will be asked to clean up their tables and supplies, place their paintings, in the drying rack, and gather a free-draw paper.
Cleanup will be announced 5-10 minutes before the class period concludes. Jobs of collecting materials will be designated, and once the teacher has settled the students, they will be asked to line up for dismissal.
This is a fun assignment for younger children who are first exploring the ideas of abstraction. For some it is more complicated to understand the concept of non-representational artwork. As a slightly more directed lesson this could help students explore color relationships in a fun way with the tempera media. Other extensions to the assignment could include a similar but monochromatic composition, using only once color pigment with gradations by mixing black and/or white. Another option could be a primarily analogous colored painting with the same approach.
References:
Henry, S. (2007). Making amazing art. (pp. 70-72). Nashville,TN: Williamson Books.
Pen & Ink Comic Strip
VISUAL ARTS LESSON PLAN
Grade Level: 5 through 8
Duration: 4 or 5 Class Periods
Author: Heather Hofstetter
Date: November 30, 2011
Unit: Local and Global Communities
Lesson: Pen & Ink Comic Strip
Massachusetts Visual Arts Curriculum Framework Learning Standards
2.9 For texture, use and be able to differentiate between surface texture and the illusion of texture (visual texture).
3.6 Create artwork that employs the use of free form symbolic imagery that demonstrates personal invention, and/or conveys ideas and emotions.
4.6 Demonstrate the ability to articulate criteria for artistic work, describe personal style, assess and reflect on work orally and in writing, and to revise work based on criteria developed in the classroom.
Specific Lesson Objectives:
2.9 Students will learn how to use pen and ink to create the illusion of texture. They will learn how to differentiate between surface texture that is tangible, and visual texture which is not. They will learn that visual texture doesn’t always have to represents surface texture. It can be a pattern or aesthetic design created to help the composition.
3.6 Students will learn to create artwork using symbolic imagery that demonstrates personal invention, and/or conveys ideas and emotions. The students will learn how to tell a story through images in pen and ink. The images will convey an idea, emotion, or any concept or story invented by the student.
4.6 Students will learn to describe their own personal style that they associate with their work. They will be able to present their pen and ink comic strip to the class and explain the choices they made in creation (whether they chose to create an inventive story, one that conveys an emotion, or one that conveys an idea). The students will learn to write about their work describing their process and how it applies to the lesson objectives. They will also learn to revise their work based on feedback from the class and criteria developed by the teacher.
Assessment of Learning Grading Rubric
Lesson: Pen & Ink Comic Strip
Lesson Objective
Standard
Number
Evidence Beyond Mastery
(4 points)
Evidence of Mastery
(3 points)
Evidence of Need to Improve toward Mastery
(2 points)
Little or no attempt toward Mastery
(1 point)
Students will learn how to use pen and ink to create the illusion of texture. They will learn how to differentiate between surface texture and visual texture.
-Students will be asked to include one element of visual texture in every slide in the sequence (6).
2.9
The final comic pen and ink piece includes more than one element of visual texture in every slide. Each element of visual texture adds a structure to the piece and maintains visual balance without distracting the viewer too much from the story or message. The texture is detailed and inventive.
The final comic strip correctly includes 6 elements of visual texture. One example is chosen for each slide.
The final piece includes 3 or more identifiable elements of visual texture.
The final piece exhibits minimum or no examples of visual texture.
Students will learn to create artwork using symbolic imagery that demonstrates personal invention, and/or conveys ideas and emotions. The students will learn how to tell a story through images in pen and ink. The images will convey an idea, emotion, or any concept invented by the student in 6 slides. Some freeform imagery can be used as or be created independent from the elements of visual texture.
3.6
The final pen and ink comic strip uses symbolic imagery to tell an inventive story or convey a positive idea or emotion in 6 slides. The student goes above and beyond by elaborating beyond the basic description of an idea or concept, paying attention to detail and making sure the sequence can be read and understood by most viewers.
The final pen and ink comic strip successfully uses symbolic imagery to tell an inventive story or convey an idea or emotion in 6 slides.
The student begins to convey message, idea, or emotion in their pen and ink comic strip but it does not include symbolic imagery or the imagery is not easily interpreted by most viewers.
The student’s final work does not tell a story; convey an idea, or an emotion. It does include symbolic imagery. The comic strip does not include 6 slides in a sequence.
Students will learn to describe their own personal style that they associate with their work. They will be able to present their pen and ink comic strip to the class and explain the choices they made in creation (whether they chose to create an inventive story, one that conveys an emotion, or one that conveys an idea).
-The students will learn to write about their work describing their process and how it applies to the lesson objectives.
-They will also learn to revise their work based on feedback from the class and criteria developed by the teacher.
4.6
The student has successfully described their personal style in their written reflection as well as their presentation in front of the class. The student has expanded upon that by explaining why they create artwork the way they do. The written reflection has also included an explanation to the choices they made in creation (whether they chose to create an inventive story, one that conveys an emotion, or one that conveys an idea).
-The student’s writing thoroughly explains which symbolic imagery he/she used in his/her comic strip. The student also explains how or why he/she made these decisions.
-The student openly participated in discussion about their piece during the presentation. The student made changes based on the feedback given by the class or from the teacher.
A description of the student’s personal style is included in his/her written reflection of the pen and ink comic strip as well as in the verbal presentation. Both the written reflection and the verbal presentation included an explanation of their story, idea, or emotion and why.
-The written work describes their process, their symbolic imagery included in their final piece.
-The student has made revisions based on the feedback given by peers and/or the teacher during the student’s presentation.
The written reflection or verbal presentation did not accurately describe a personal style that the student associates with their work. The explanation of process, story, emotion, or idea was vague or poorly written.
-The student left out some descriptions of symbolic imager.
-The student was minimally open to feedback and only made one or two minor revisions based on peer and teacher feedback.
The student has not written a personal reflection or presented their final comic strip or the reflection does not include a description of personal style, process, or story.
-The student did not write about their usage of Symbolic imagery.
-The final piece does not exhibit any changes or revisions made based on help from peers or teacher.
Essential Questions:
What is important to me about my community that I would like to describe in my art?
What story do I want to tell in my comic strip?
Guiding Questions:
Once I have decided on the story, concept, or emotion how do I show that through symbolic imagery?
Which elements of my story are the most important and identifiable to include in my slides?
What symbols can I use to tell my story?
How can I include visual texture in my story sequence?
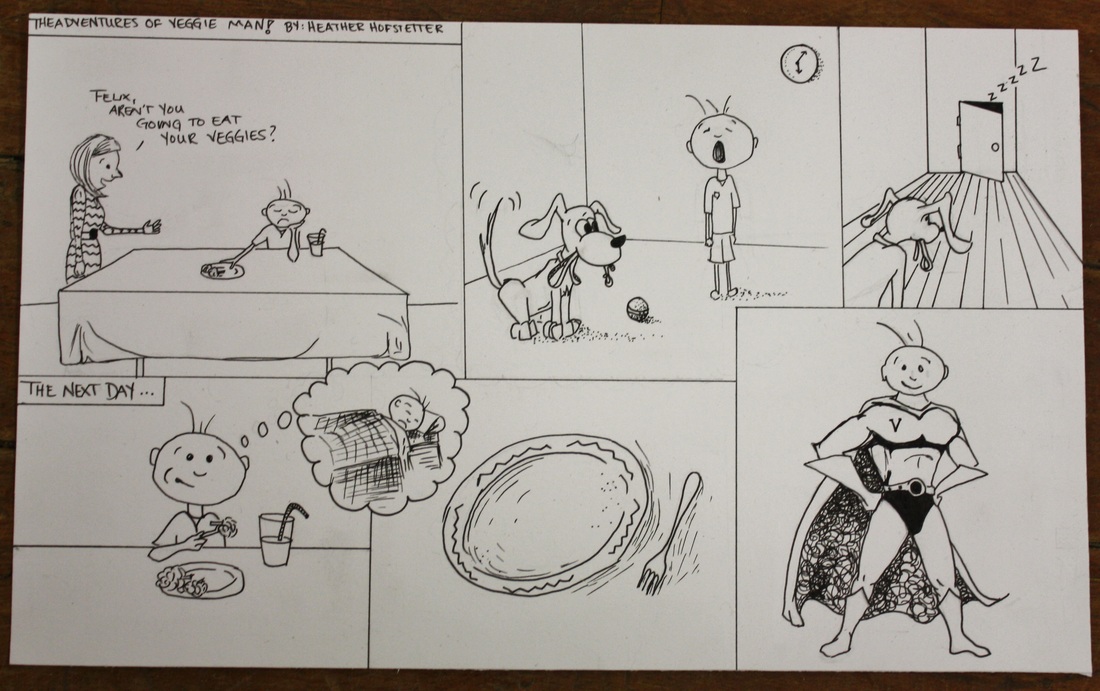
Activity: The students will be creating a 6 part story sequence using pen and ink. The story will be stemming off of an experience that the student has had or an inventive story based on one’s community, possessing some sort of positive underlying message, emotion, or theme. The comic strip should also employ methods of visual texture patterns, and symbolic imagery that the students have created to add to the message being conveyed. Everyone will be encouraged to be as imaginative as they wish in creating super heroes and circumstances to elaborate on their motif. When the students have completed their first preliminary drawings of their comic strip in pencil first, they will each be asked to give a short presentation of their work followed by a group discussion on the overall interpretation of the piece. The students will then make any changes they will like and move on to finish in pen and ink. For homework the students will be asked to write a brief reflection on the assignment. Both the presentation and the written reflection should include;
· A description of their process and the message and meaning behind their story (why they want to convey this message)
· An explanation of the visual texture and/or symbolic imagery used.
· (Written reflection only) If and how they changed their piece based on peer and teacher feedback, and how it affected the overall piece.
Motivation:
The class will be given a class period to experiment with the pen and ink medium. During this time they will also be learning about visual texture and how it can help bring together a piece. When it comes time for creation the students will be given the freedom to become storytellers. The piece will be based on their inventive process and what message is important for them personally to deliver. The students will be provided with a pile of comic books and other image references to spark possible ideas or interest. If a student is stuck or cannot think of a topic there may be a small list of predetermined themes or messages that the teacher will have on standby (“Why we shouldn’t litter.” “Don’t be a bully.” “What happens when you help a neighbor.” Or emotions; relief, hope, gratitude, resect, empathy).
Materials:
Drawing paper
Pen Holders
Pencils
Art Gum or Vinyl Erasers
Assortment of nibs
India Ink (washable)
Sketch Pens
Rulers
Masking Tape
Water Cups
Paper Towels
Paint Brushes
Procedure:
Class Period 1:
During the first class the teacher will spend the period teaching the students how to use the medium. He or she will disperse small pieces of drawing paper, an assortment of nibs, pen holders, sketch pens, rulers, and small cups for ink. The teacher will pour a small amount of ink into each cup and provide paper towels for each table for the students to wipe their nibs.
The teacher will then play a quick instructional video on a few pen and ink techniques: http://thevirtualinstructor.com/penandink.html
He/she will afterwards demonstrate the same techniques used in the video (hatching, crosshatching, stippling, and random lines) on a piece of paper on a table, in front of the class, this time using the penholder and nib. Once the nib is secure in the holder he teacher will demonstrate that you dip the pen in the ink, wiping off any excess ink on the side of the cup, and lightly pressing the nib on the paper pulling the pen across the surface. When drawing, the nib must be pulled across the paper, not pushed. This will cause it to dig into or catch on the surface. Pushing will damage both the pen and paper and also cause ink to splatter and blot. Using washable ink will prevent build up on the nib so the students will not have to rinse as often.
The teacher will then demonstrate a few other techniques of choice and show some images (attached) of different types of visual texture used to create pattern, convey value (light and dark), or volume (3D form). The students will then be asked to use the rest of the class period experimenting with different types of textures and lines using the nibs. He/she will point out that different nibs result in different lines and the heavier hand you use the thicker the line. However, there is a bit of a trick to using the nibs, and the only way to really learn how is to get a feel for them and experiment.
The next few minutes of the class will be designated for the students to experiment with the medium provided. Their task for the class is to make 6 blank cubes (like the ones shown in the video). Then they will choose 5 techniques and/or visual textures to fill the cubes (one for each cube), and make up one texture pattern of their own. The teacher will explain that it might be a little difficult for them to get the hang of it at first. These will just be practice sheets and they should keep trying, varying pressure until they have found what works best for them. The teacher will circulate the class answering questions and allowing assistance to anyone who needs it.
The teacher will then introduce the comic strip assignment to the class. The objectives will the explained at this time and the rubric will be dispersed. He/she will explain to the students that for homework, they should begin brainstorming and thinking of the story they would like to tell. They will be reminded that they may be as creative, inventive, or as literal as they like, as long as it doesn’t take away from the overall message being conveyed. The students can continue practice sketching in pen and ink or they begin brainstorming for their assignment.
The teacher will announce cleanup 5-10 minutes before class dismissal.
Class 2:
There will be a small pile of comic books and newspaper clippings (comics) on each table. The teacher will tell them to feel free to look through the comics for inspiration, but they will not be allowed to copy any images or story plots. Their whole comic strip should be from their own minds.
At this point each student should have a basic idea of what they would like to do. Once, they have decided this, and the teacher has agreed that it is a valuable concept, they should begin planning and sketching, with pencil, on regular pieces of paper. The teacher should remind the students that they should try to use symbols whenever, wherever they can. In art, words are not commonly used so artists rely on symbols to help convey their messages. If the students do not know what symbolism is, the teacher can explain that symbols are images of things that stand for something else. For example; the dove and the olive branch represents peace, the American flag stands for our country, and rotting fruit symbolizes the passage of time. Even the types of visual texture used can portray more abstract symbols of emotions. Violent zigzags could mean anger, and calmer squiggles could be happy. The teacher can explain that symbols can mean anything you want them to.
When the students seem to be on the right track and have begun designing their comic, the teacher will then give each student a large piece of drawing paper to begin their comic strip. The teacher will then demonstrate in front of the class that they will divide the paper into 6 squares (or rectangles). Some rectangles can be larger than others. The larger rectangle the more important that segment of the story is, so they should keep this in mind when designing their comic.
When preliminary sketches of the storylines have been finished and the students are comfortable, they should begin to draw their images onto the large drawing paper with pencil first. When the students are almost done with their pencil drawing the teacher will divide the class into small groups where the students will individually present their comic to the classmates in their group. On the board the teacher will write what they should touch upon when they are talking about their piece;
§ A description of their process and the message and meaning behind their story (why they want to convey this message)
§ An explanation of the visual texture and/or symbolic imagery used.
When the student is done speaking, his/her classmates within the group will give their feedback about what they like and what they think the student could do to improve their piece.
When the discussion groups have concluded and each student has had a turn to talk about their work the teacher will ask the class to resume working and walk to each group to ask the students what they have learned.
The rest of the class will be work time. The teacher will announce cleanup 5-10 minutes before class dismissal.
Class 3:
At this point the pen and ink supplies should be brought back out with the addition of drawing pens, and the students should begin lining over their pencil markings in ink. The teacher should state that if anyone still does not feel comfortable using the pen nibs and holders after the activity in the previous class, then, they can resort to using the sketch pens instead. Both will be available. The students will also be reminded that there should be at least one element of visual texture and technique used in each segment. The teacher will then state that flat black areas can also be used in spaces, by applying the ink to the paper with a brush. This can create drama and contrast. However, this process should be left for last, because the ink takes a bit longer to dry and can smudge. Another tip for comic making would be to keep the dialogue to the minimum. We don’t want the text to take away from the artwork, and as previously learned, much of the message can be told through symbolic imagery. The teacher should tell everyone to work neatly and slowly, and be careful for scratching and smudging.
The teacher will continue to help if anyone has questions, and offer advice and feedback as he/she walks around the room. The teacher will announce cleanup 5-10 minutes before class dismissal.
Class 4:
At this time the students may need an additional class period, or they may be putting the finishing touches on their comic strips. The teacher will tell the students that when the piece is completely dry they may begin to erase some of the underlying pencil parks on their drawing. He/she will explain that art gum and vinyl erasers are best for removing pencil lines on inked work. Art gums, in particular, will not damage the inked lines. Rough erasers and “ink erasers” are not recommended- they tend to damage the surface of the paper and make it lintier (South.)
When the students are completely finished with their pen and ink comic strip, the teacher will remind them that part of the assignment is to write a reflection on their final piece. The written reflection must include:
§ A description of their process and the message and meaning behind their story (why they want to convey this message)
§ An explanation of the visual texture and/or symbolic imagery used.
§ If and how they changed their piece based on peer and teacher feedback, and how it affected the overall piece.
If there is time in class the students can write this reflection while others are finishing up their pieces. The rest of the students will be completing this for homework.
The teacher will announce cleanup 5-10 minutes before class dismissal.
A follow-up lesson could be a final presentation or second group critique with their finished pieces. This would give the students a chance to see each other’s work and hear their stories.
Appendices: Instructional diagrams are attached at the end of the lesson.
References and specific resources:
http://www.mmwindowtoart.com/foundations/foundationstexture2.html
http://www.jacquiblackman.co.uk/dip_pens.htm
http://drawsketch.about.com/od/penandink/a/inknibs.htm
Pen and Ink Instruction Video
http://thevirtualinstructor.com/penandink.html
Teacher Example